部署
创建数据库
bash
mysql -u root -p

create database if not exists yuzhu default character set utf8mb4 default collate utf8mb4_general_ci;

create user 'yuzhu'@'localhost' identified with caching_sha2_password by '密码';  # 密码自行定义

grant all privileges on yuzhu.* to 'yuzhu'@'localhost';

flush privileges;

exit;
下载源码
1. 直接下载
https://github.com/hefengbao/yuzhu/releases
或者
https://gitee.com/hefengbao/yuzhu/releases
2. 克隆代码
git clone https://github.com/hefengbao/yuzhu.git /var/www/yuzhu

或者

git clone https://githee.com/hefengbao/yuzhu.git /var/www/yuzhu
shell
cd /var/www/yuzhu

git checkout release
安装扩展包:
bash
composer install --optimize-autoloader --no-dev --ignore-platform-reqs配置:
cp .env.example .env

php artisan key:generate

php artisan storage:link
在 .env 文件中修改配置,主要是下面几项:
APP_NAME=玉竹 #修改为自己的博客名称,若中间有空格、标点符号,请用英文引号("")包裹
APP_ENV=production
APP_KEY=
APP_DEBUG=false
APP_URL=http://localhost # 修改为自己博客域名

...

DB_DATABASE=yuzhu // 修改数据库名称
DB_USERNAME=yuzhu    //修改数据库账号
DB_PASSWORD=        //修改数据库密码

...

MAIL_MAILER=smtp
MAIL_HOST=mailhog
MAIL_PORT=1025
MAIL_USERNAME=null
MAIL_PASSWORD=null
MAIL_ENCRYPTION=null
MAIL_FROM_ADDRESS="hello@example.com"


SESSION_DRIVER=redis

QUEUE_CONNECTION=redis

CACHE_STORE=redis
使用 QQ 邮箱作为邮箱服务
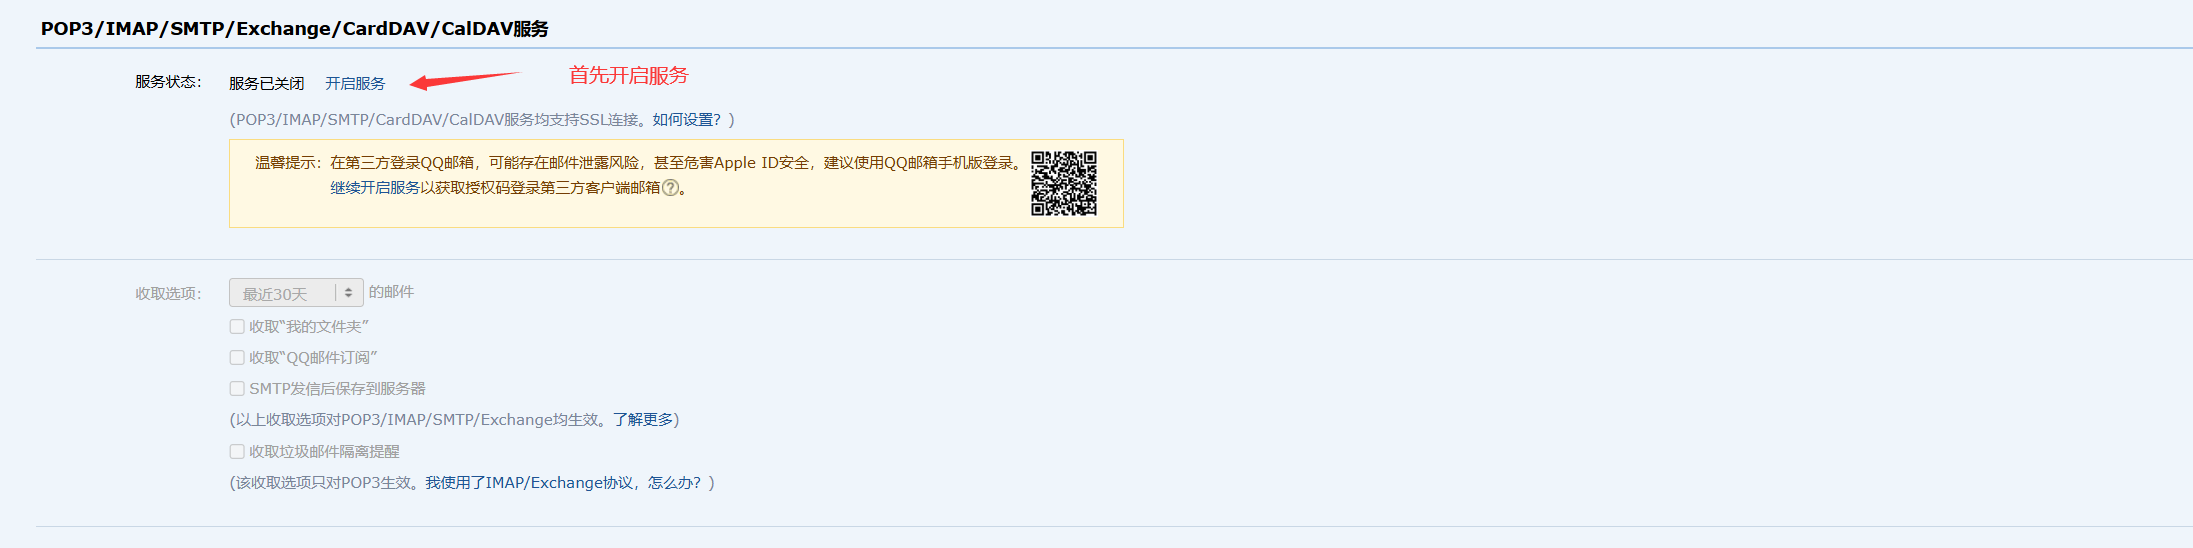
如果没有其他邮箱服务,可以使用 QQ 邮箱,登录 QQ 邮箱,选择 【设置】 - 【账号】,【POP3/IMAP/SMTP/Exchange/CardDAV/CalDAV服务】 :
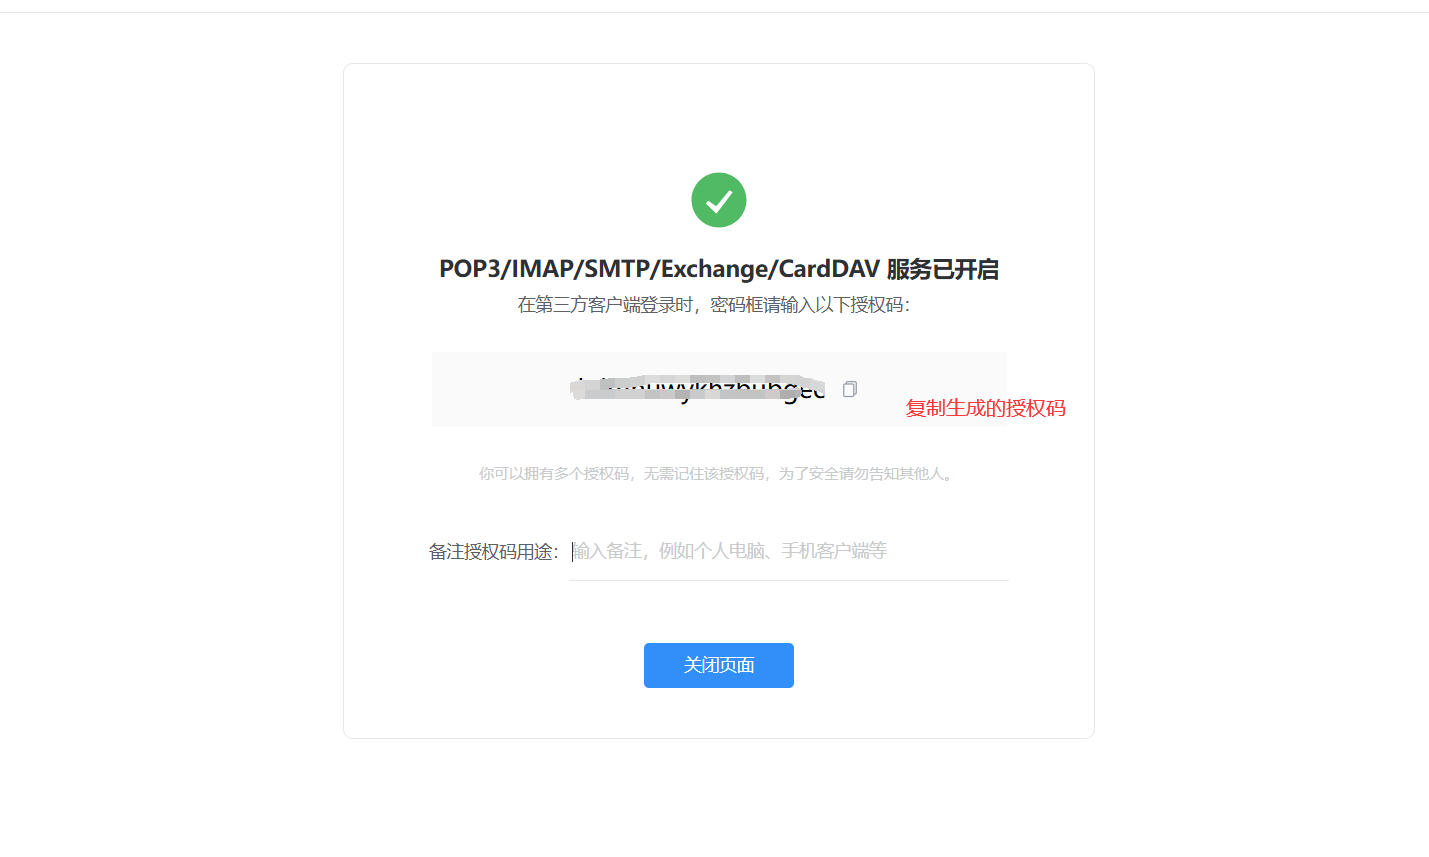
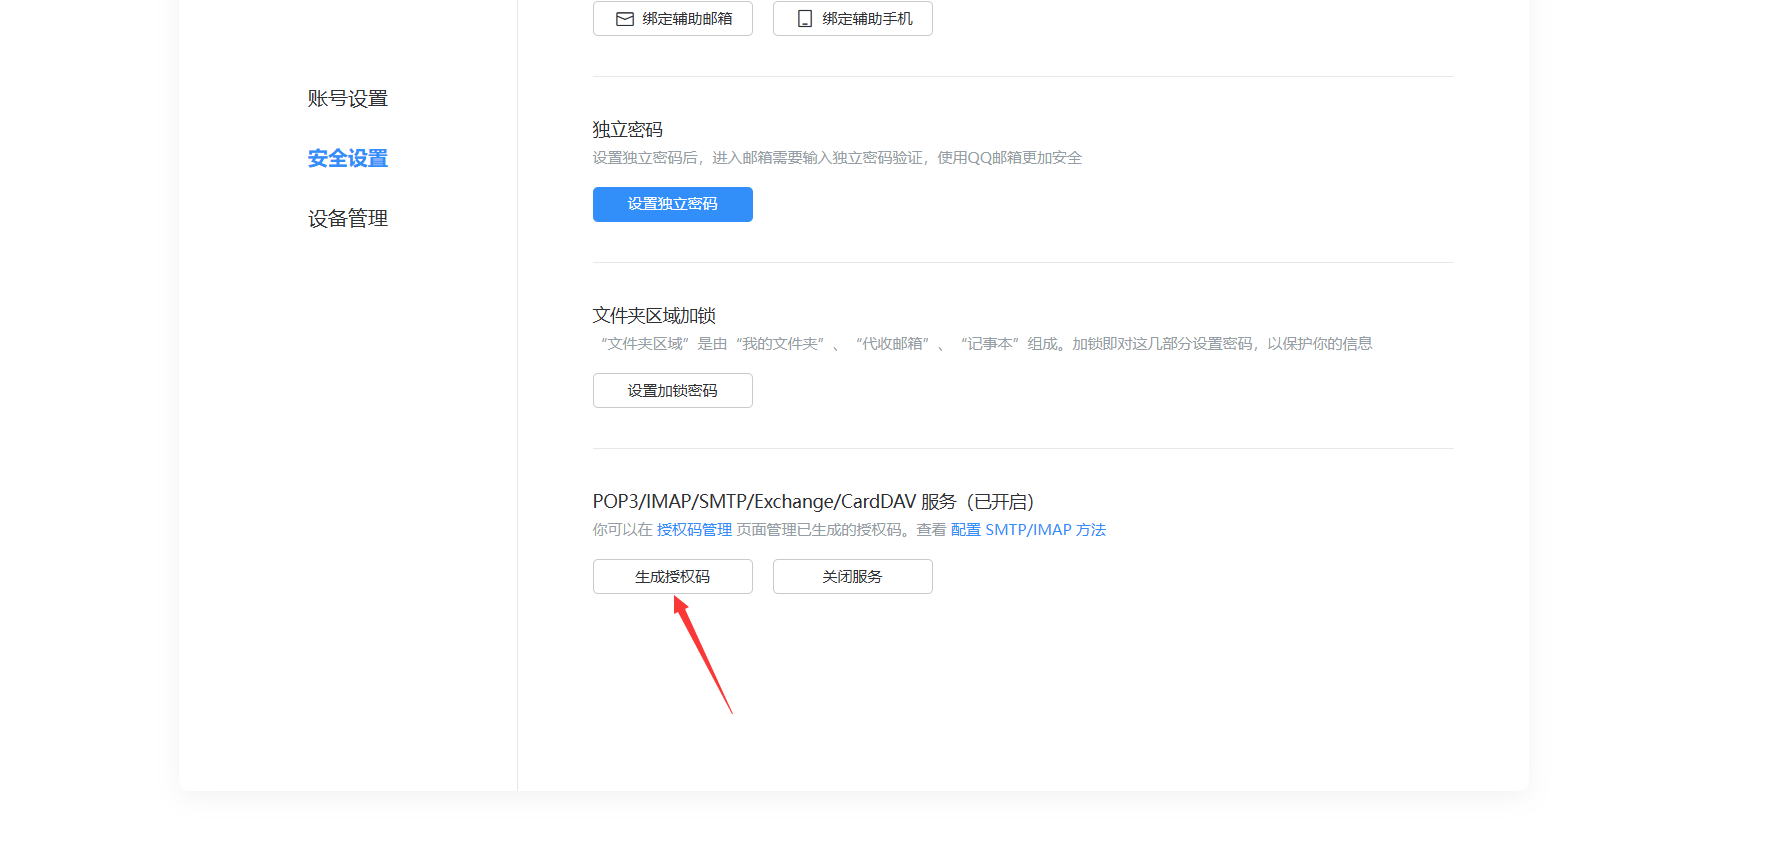
如果已开启,在点击 【管理服务】 - 【生成授权码】:
示例配置:
MAIL_MAILER=smtp
MAIL_HOST=smtp.qq.com
MAIL_PORT=465
MAIL_USERNAME="10000@qq.com"
MAIL_PASSWORD=授权码
MAIL_ENCRYPTION=ssl
MAIL_FROM_ADDRESS="10000@qq.com"
验证邮箱是否配置成功:
shell
php artisan yuzhu:check-email

php artisan queue:work --queue=high,default
生成数据表:
php artisan migrate用户组
shell
chown -R $USER:www-data ./读写权限
chmod -R 775 storage/ bootstrap/cache初始化站点
shell
php artisan yuzhu:initNginx 站点配置
shell
vi /etc/nginx/sites-available/yuzhu可参考复制如下内容修改:
bash
server {
    listen 80;
    listen 443 ssl http2;
    server_name yuzhu.test;
    root "/var/www/yuzhu/public";

    add_header X-Frame-Options "SAMEORIGIN";
    add_header X-Content-Type-Options "nosniff";

    index index.php;

    charset utf-8;

    location / {
        try_files $uri $uri/ /index.php?$query_string;

    }

    location = /favicon.ico { access_log off; log_not_found off; }
    location = /robots.txt  { access_log off; log_not_found off; }

    error_page 404 /index.php;

    access_log off;
    error_log  /var/log/nginx/yuzhu-error.log error;

    sendfile off;

    location ~ \.php$ {
        fastcgi_split_path_info ^(.+\.php)(/.+)$;
        fastcgi_pass unix:/var/run/php/php8.3-fpm.sock;
        fastcgi_index index.php;
        include fastcgi_params;
        fastcgi_param SCRIPT_FILENAME $document_root$fastcgi_script_name;


        fastcgi_intercept_errors off;
        fastcgi_buffer_size 16k;
        fastcgi_buffers 4 16k;
        fastcgi_connect_timeout 300;
        fastcgi_send_timeout 300;
        fastcgi_read_timeout 300;
    }

    location ~ /\.ht {
        deny all;
    }

    ssl_certificate     /etc/ssl/certs/yuzhu.test.crt;
    ssl_certificate_key /etc/ssl/certs/yuzhu.test.key;
}
shell
ln -s /etc/nginx/sites-available/yuzhu /etc/nginx/sites-enabled/yuzhu测试配置是否成功:
shell
nginx -tshell
nginx -s reload配置并运行 Horizon
在 /etc/supervisor/conf.d 目录中添加 yuzhu-horizon.conf 文件,内容如下:
shell
[program:yuzhu-horizon]
process_name=%(program_name)s
command=php /var/www/yuzhu/artisan horizon
autostart=true
autorestart=true
user=web
redirect_stderr=true
stdout_logfile=/var/www/yuzhu/storage/logs/horizon.log
stopwaitsecs=3600
shell
sudo supervisorctl reread

sudo supervisorctl update

sudo supervisorctl start yuzhu-horizon:*
添加 Cron 配置项(定时任务)
shell
crontab -u www-data -eshell
* * * * * cd /var/www/yuzhu && php artisan schedule:run >> /dev/null 2>&1优化
shell
php artisan optimize
php artisan filament:optimize