部署
下载代码
https://gitee.com/hefengbao/yuzhu/releases 或者 https://github.com/hefengbao/yuzhu/releases 下载代码(压缩包)。
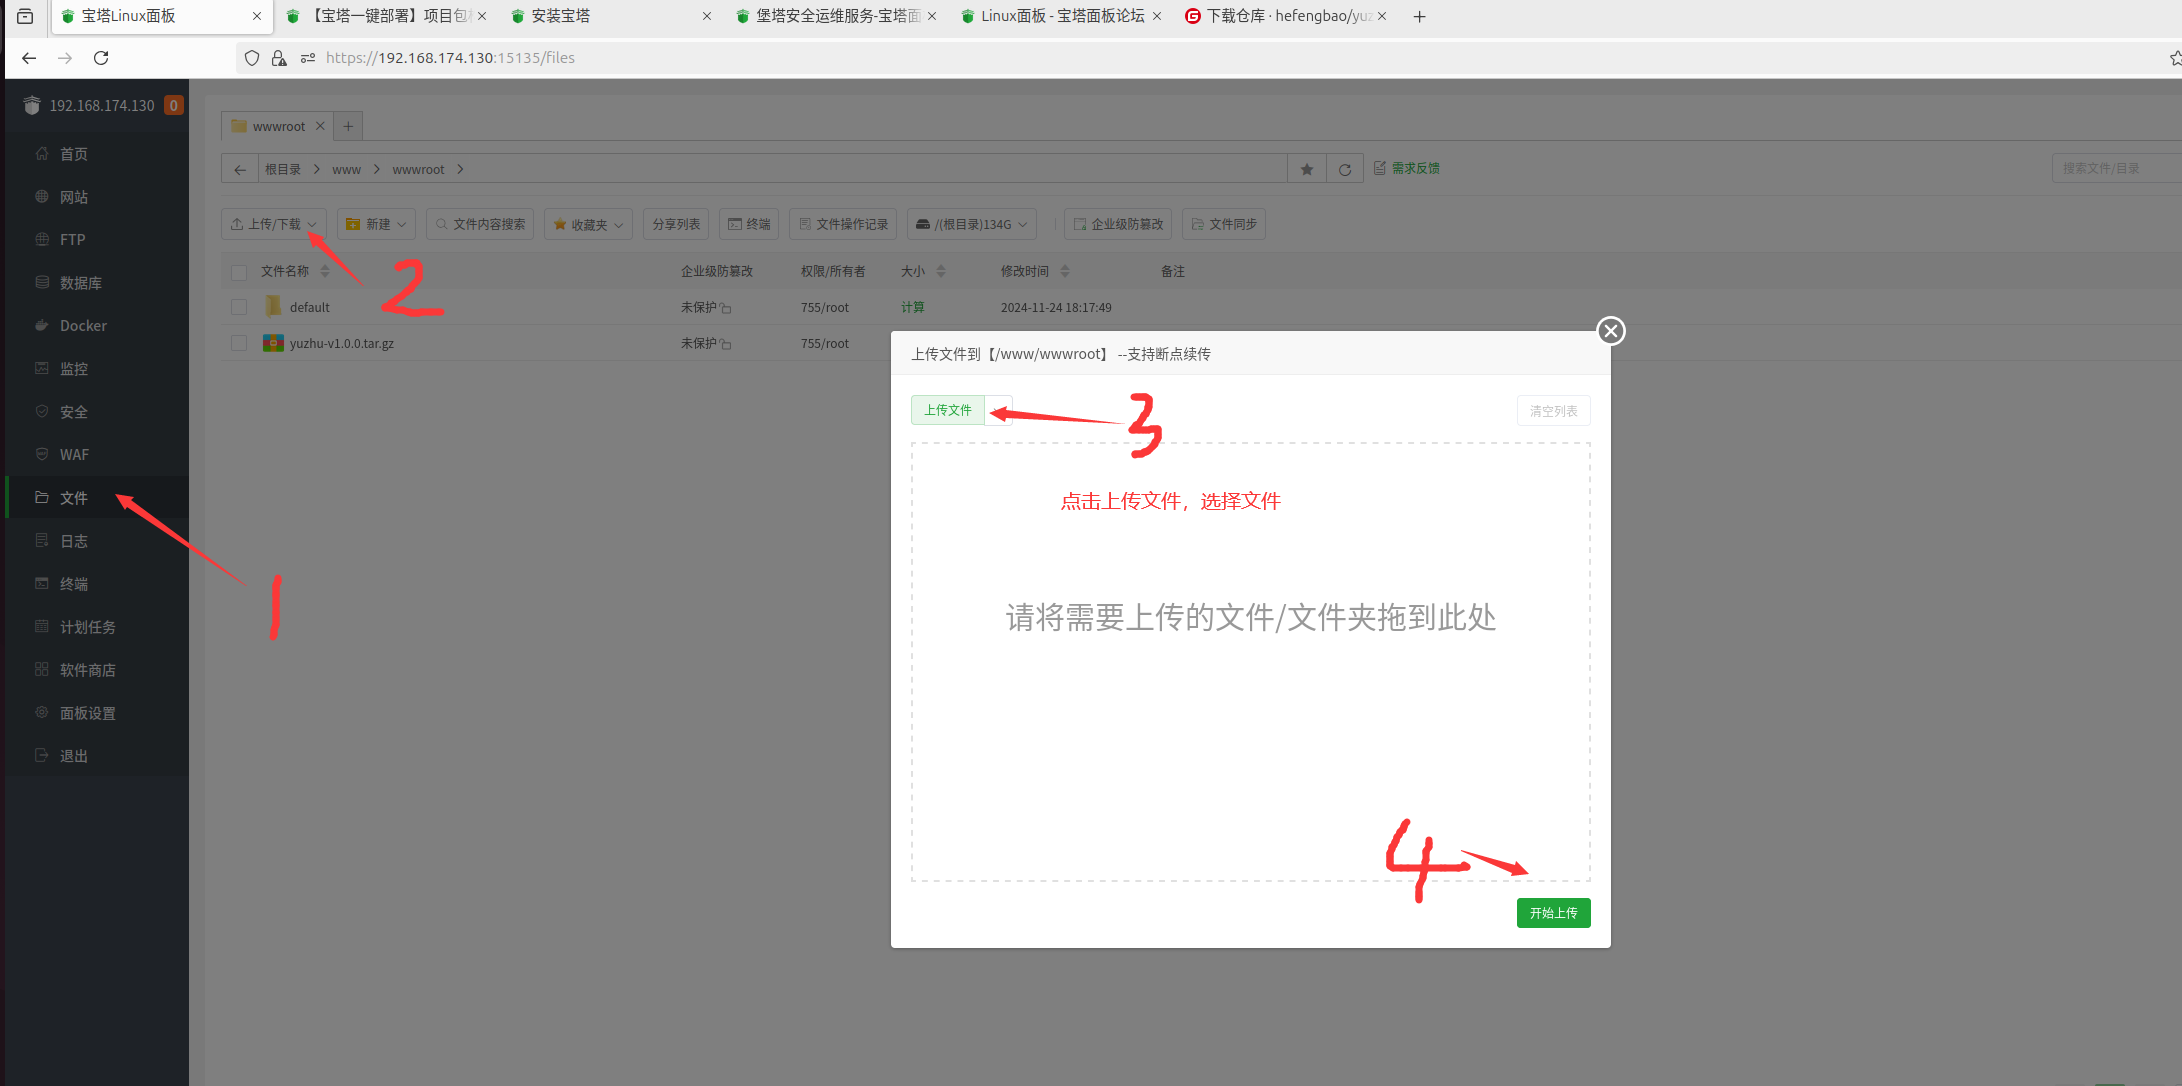
上传代码
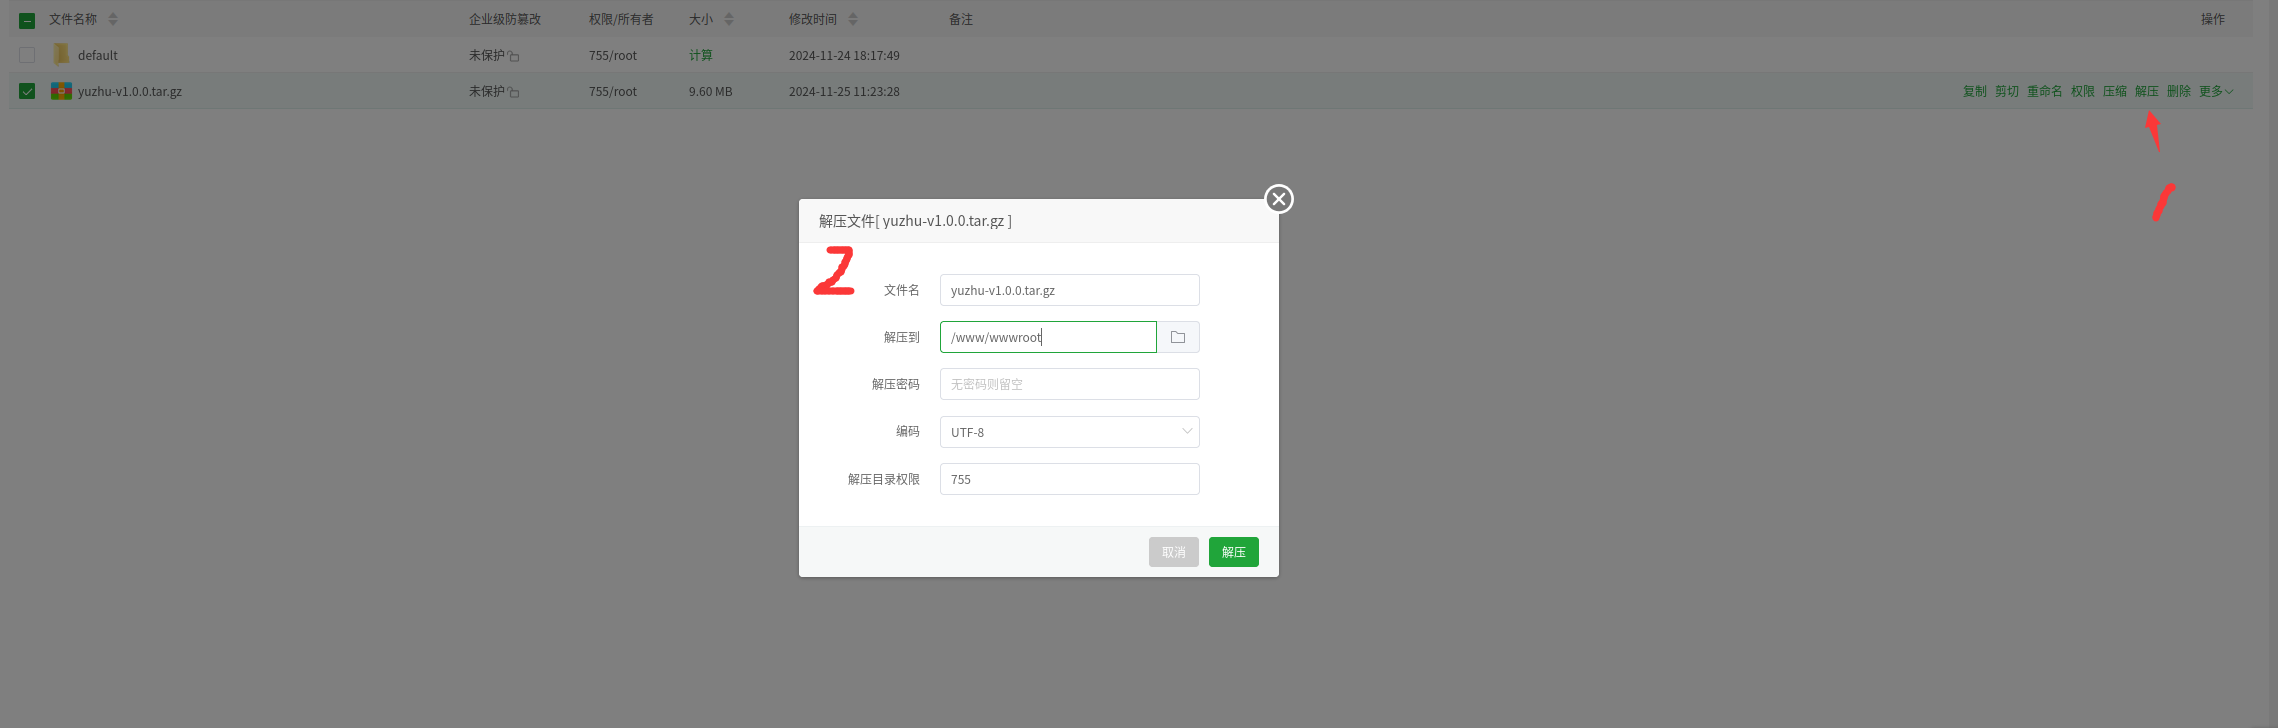
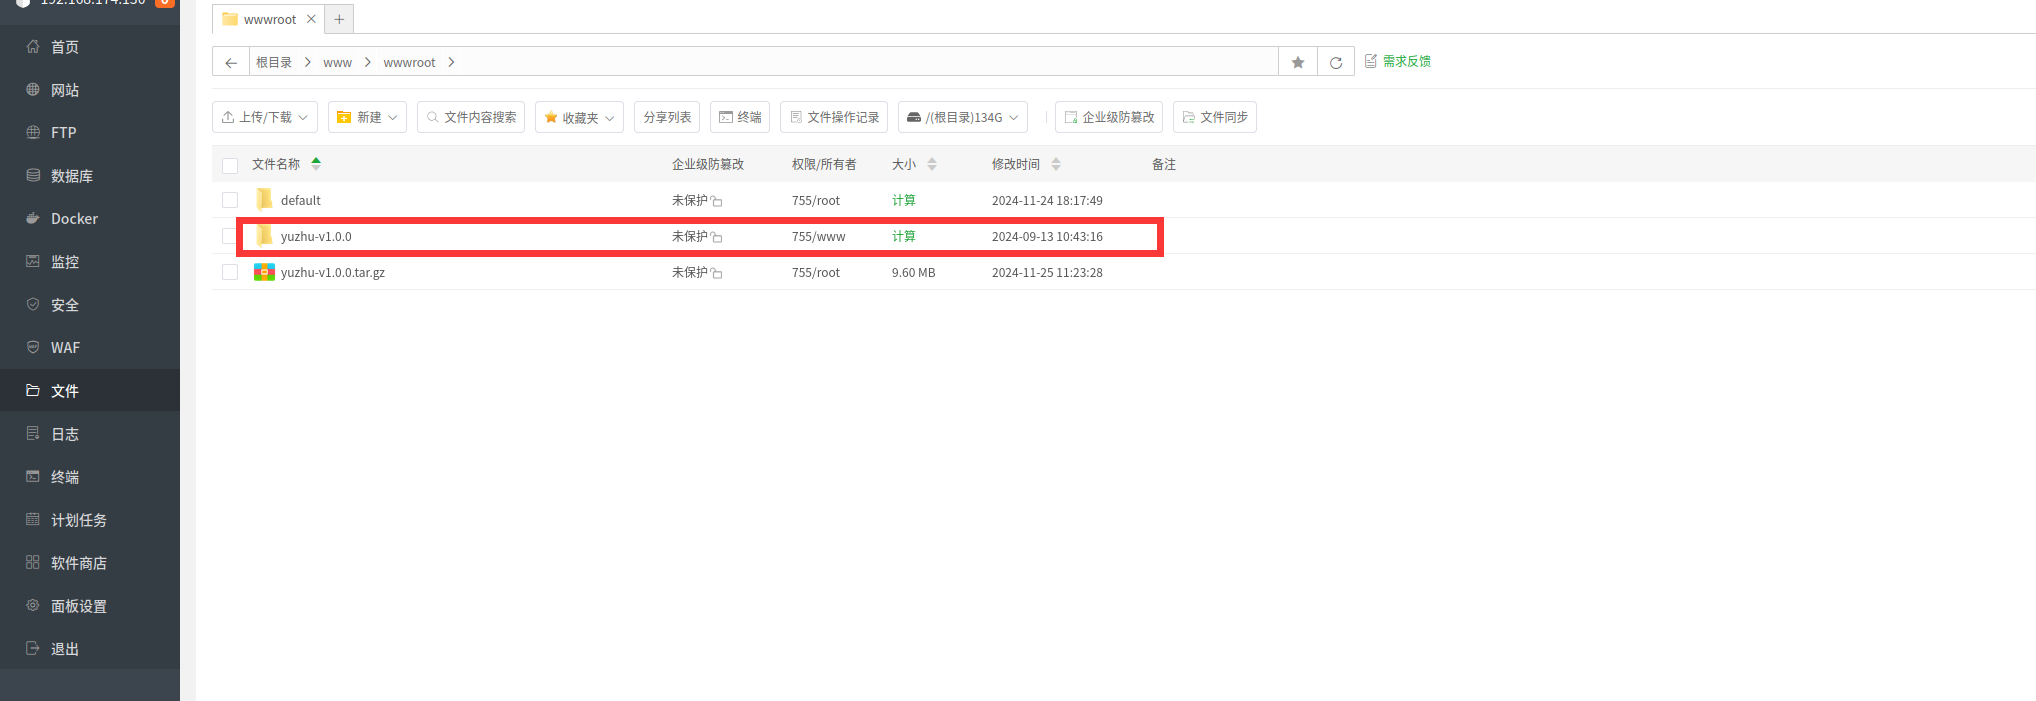
解压代码:
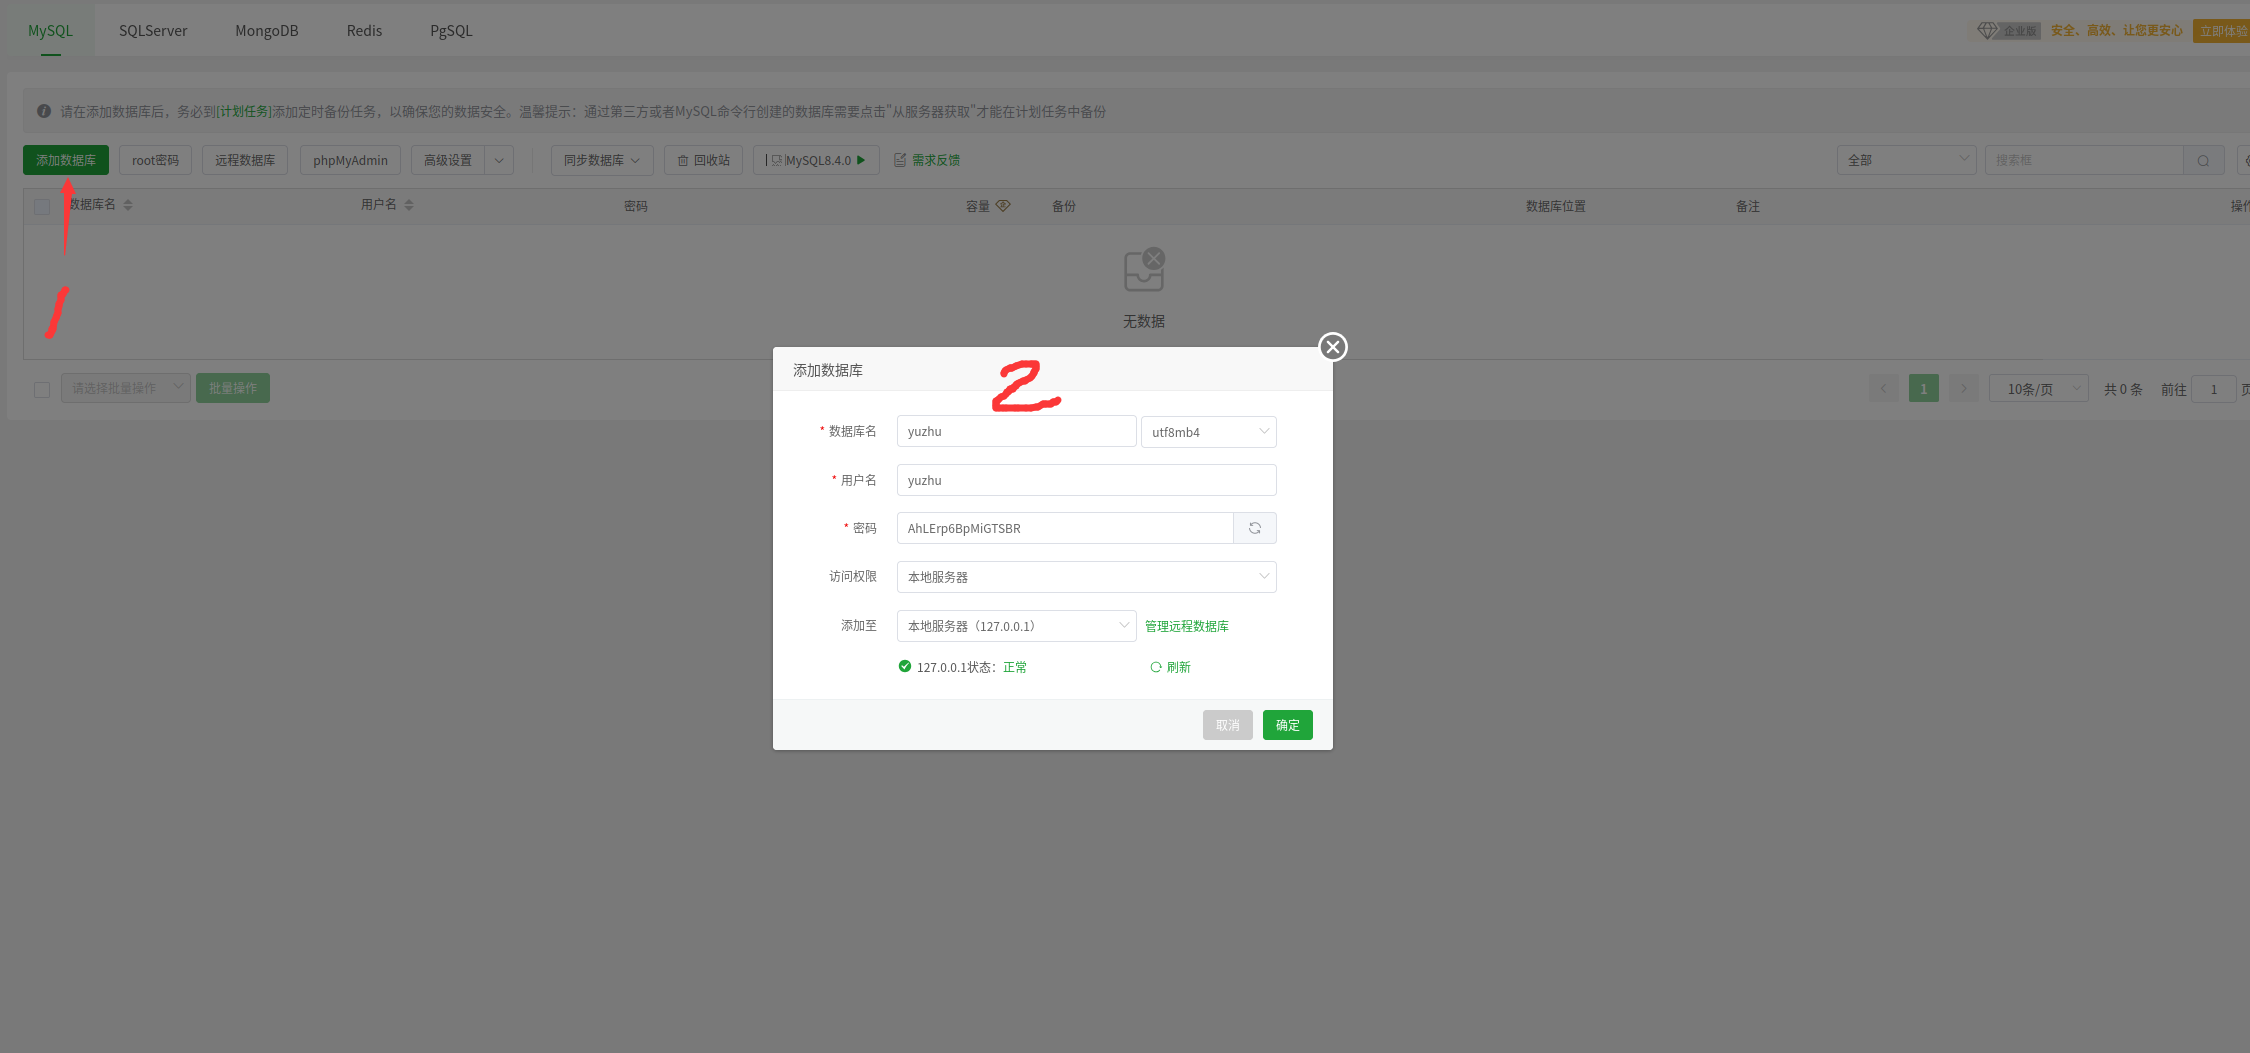
添加数据库
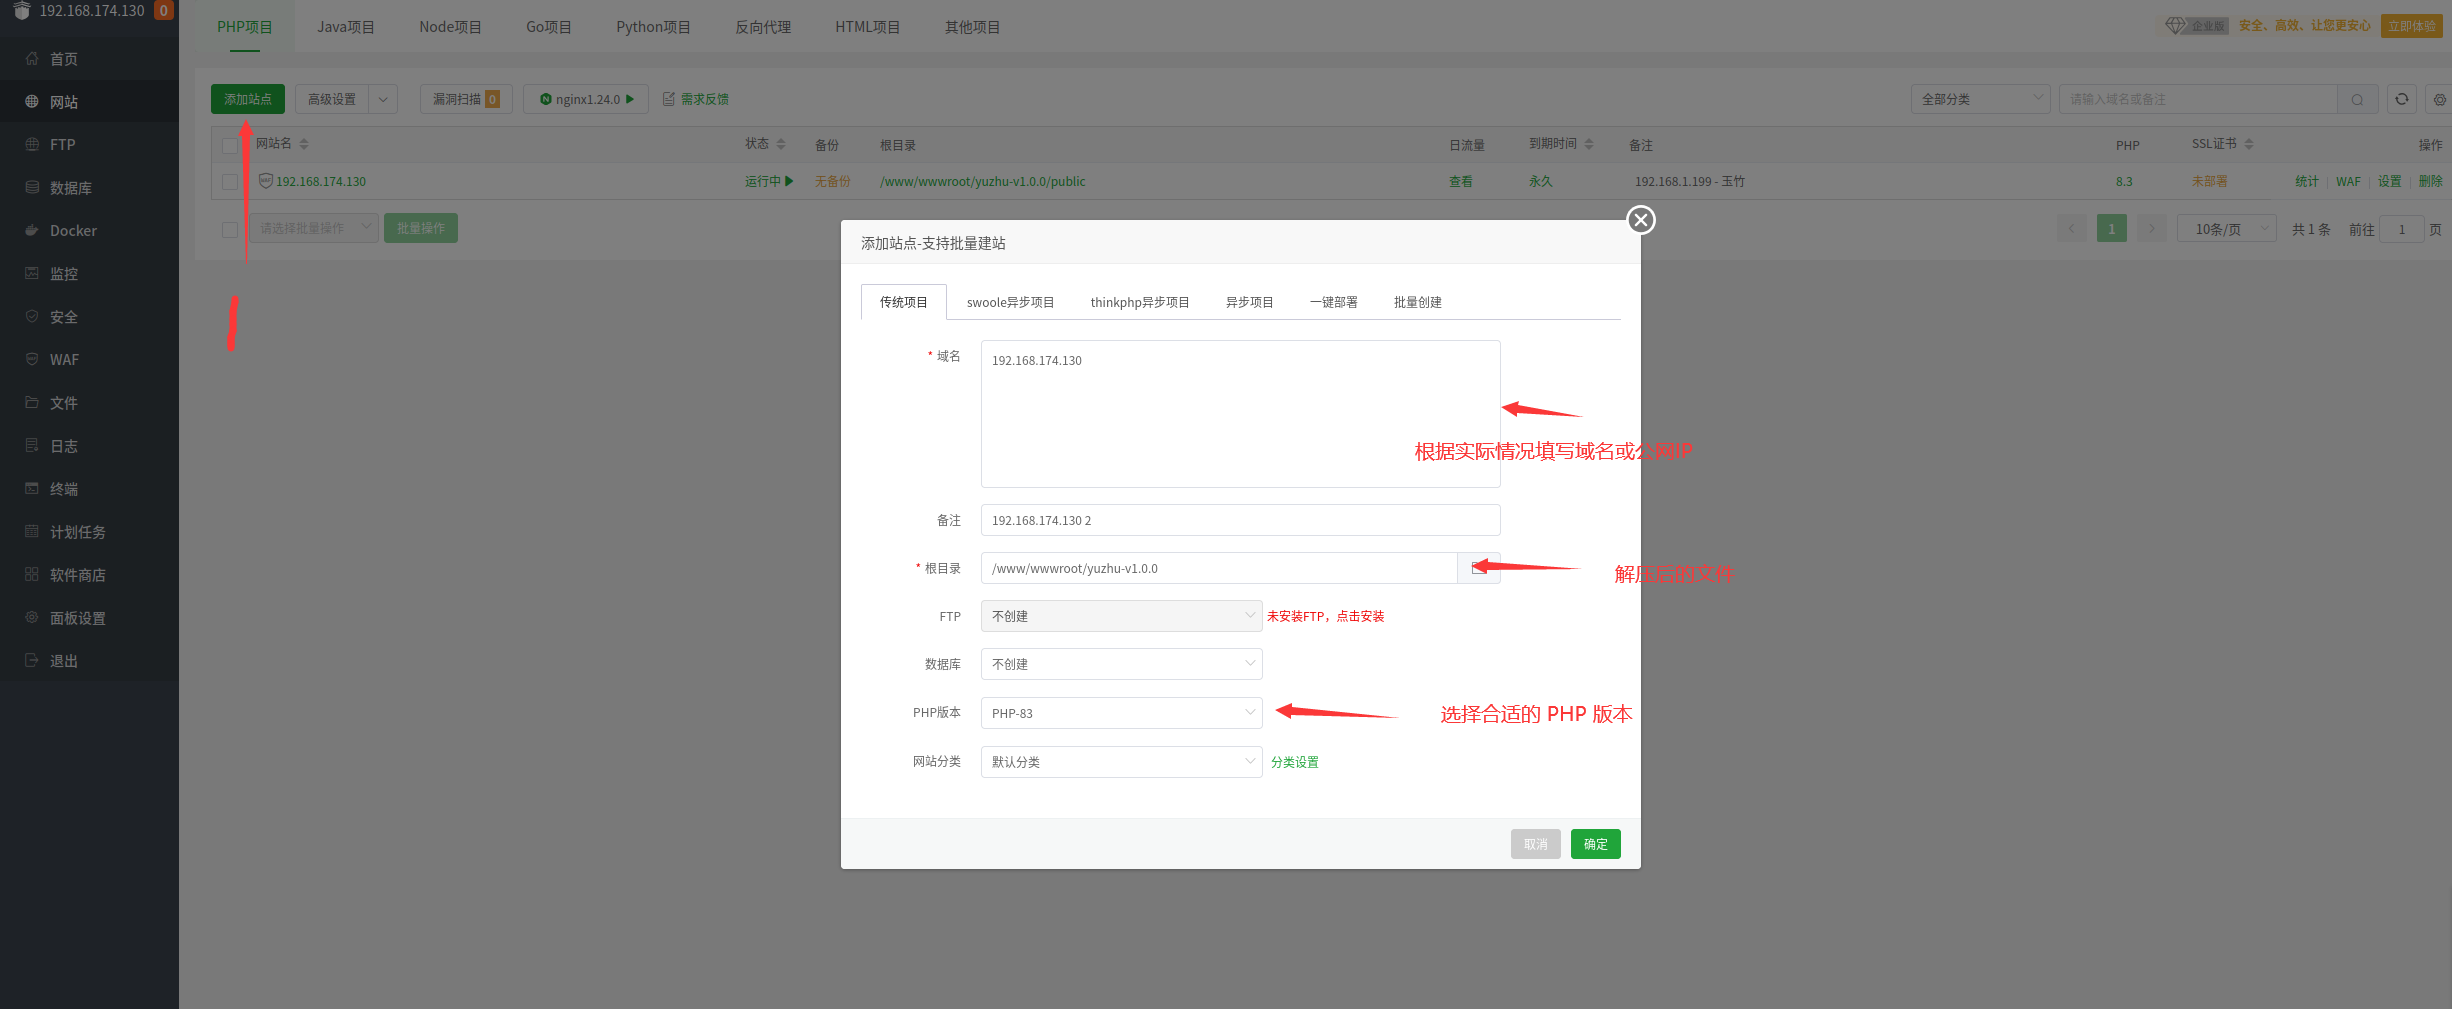
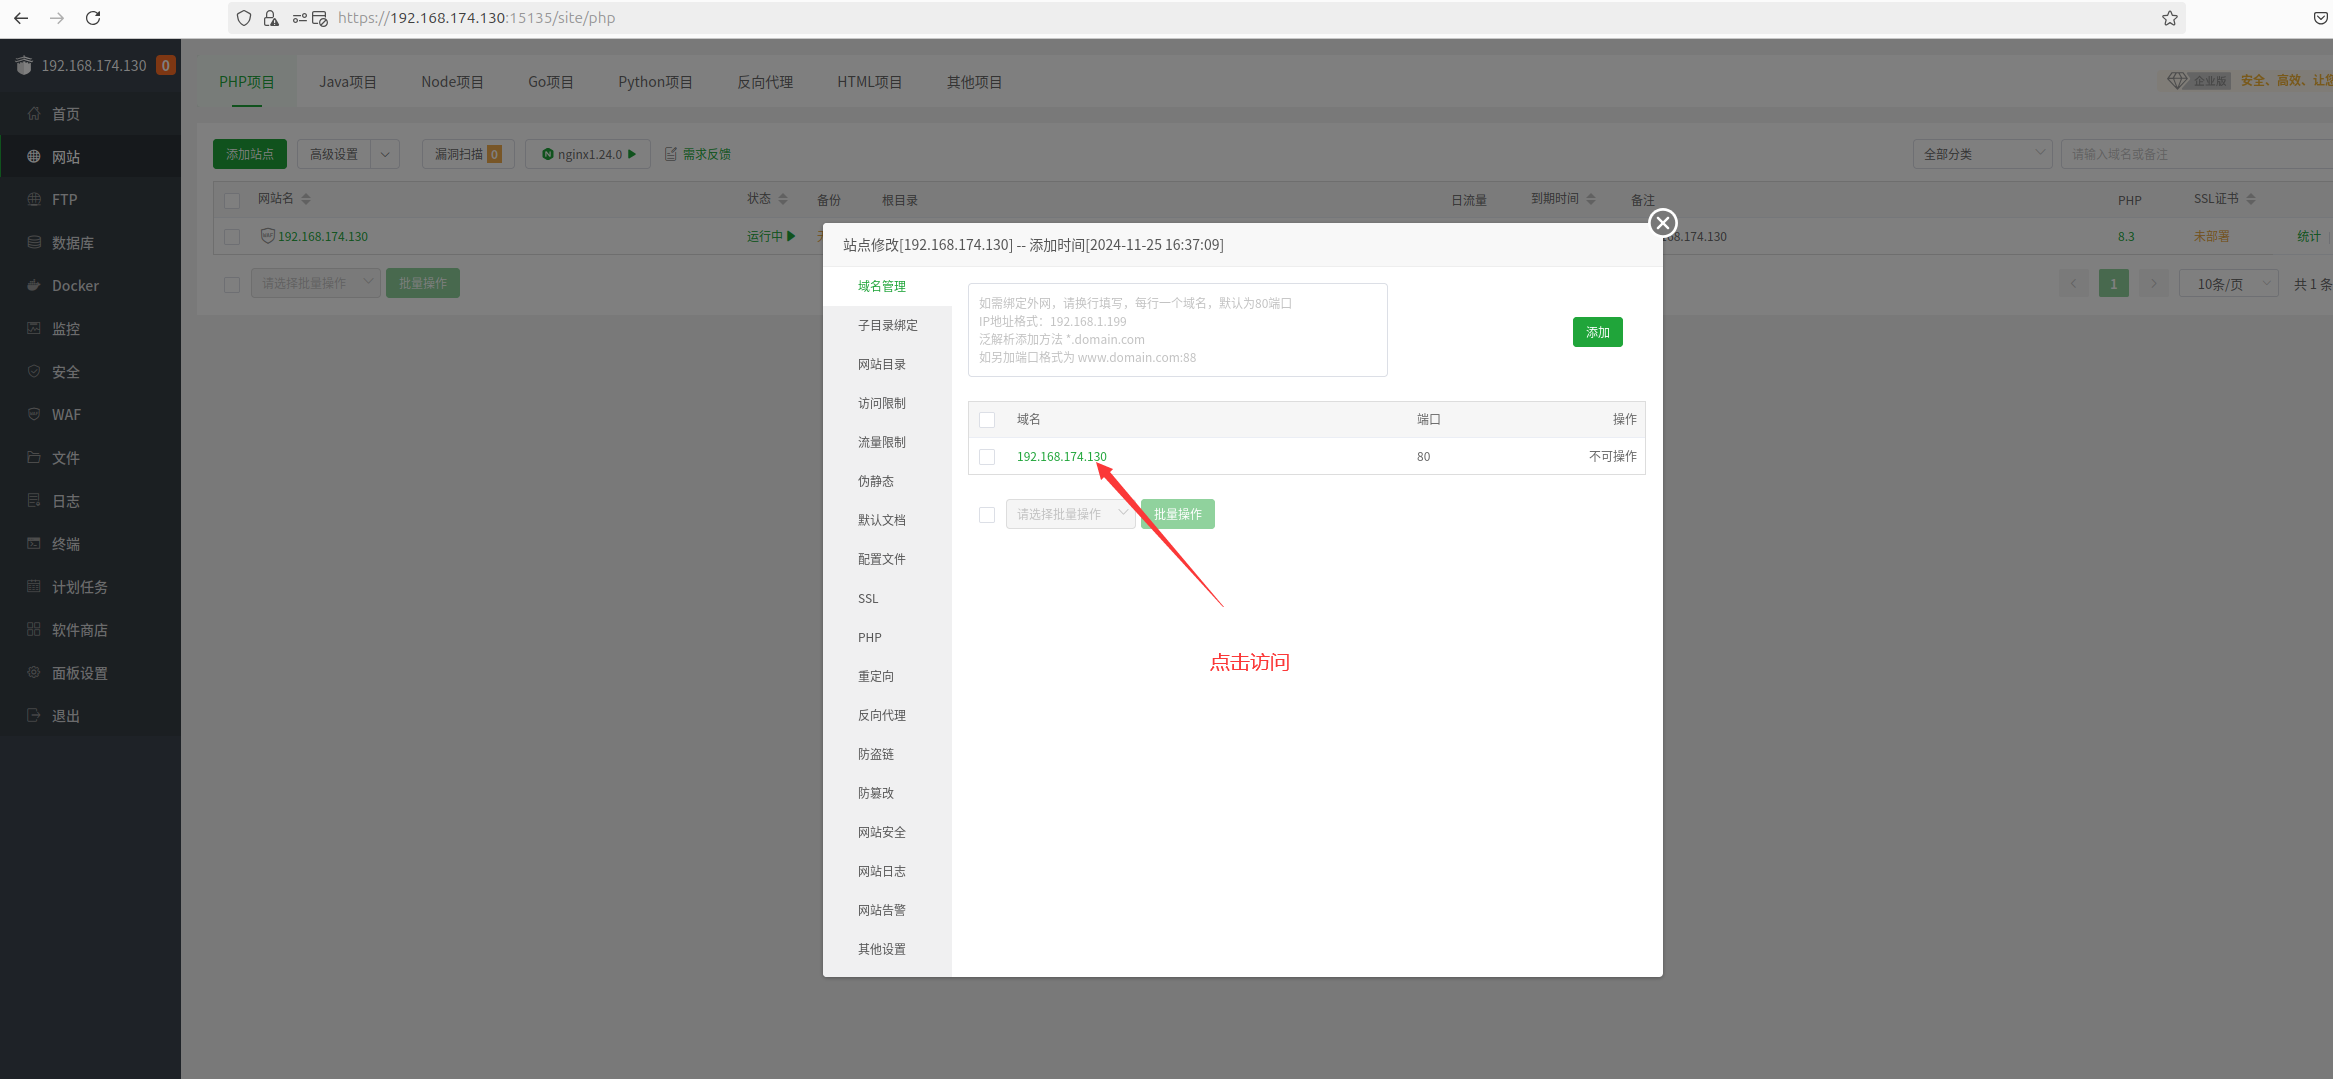
添加站点
一些设置:
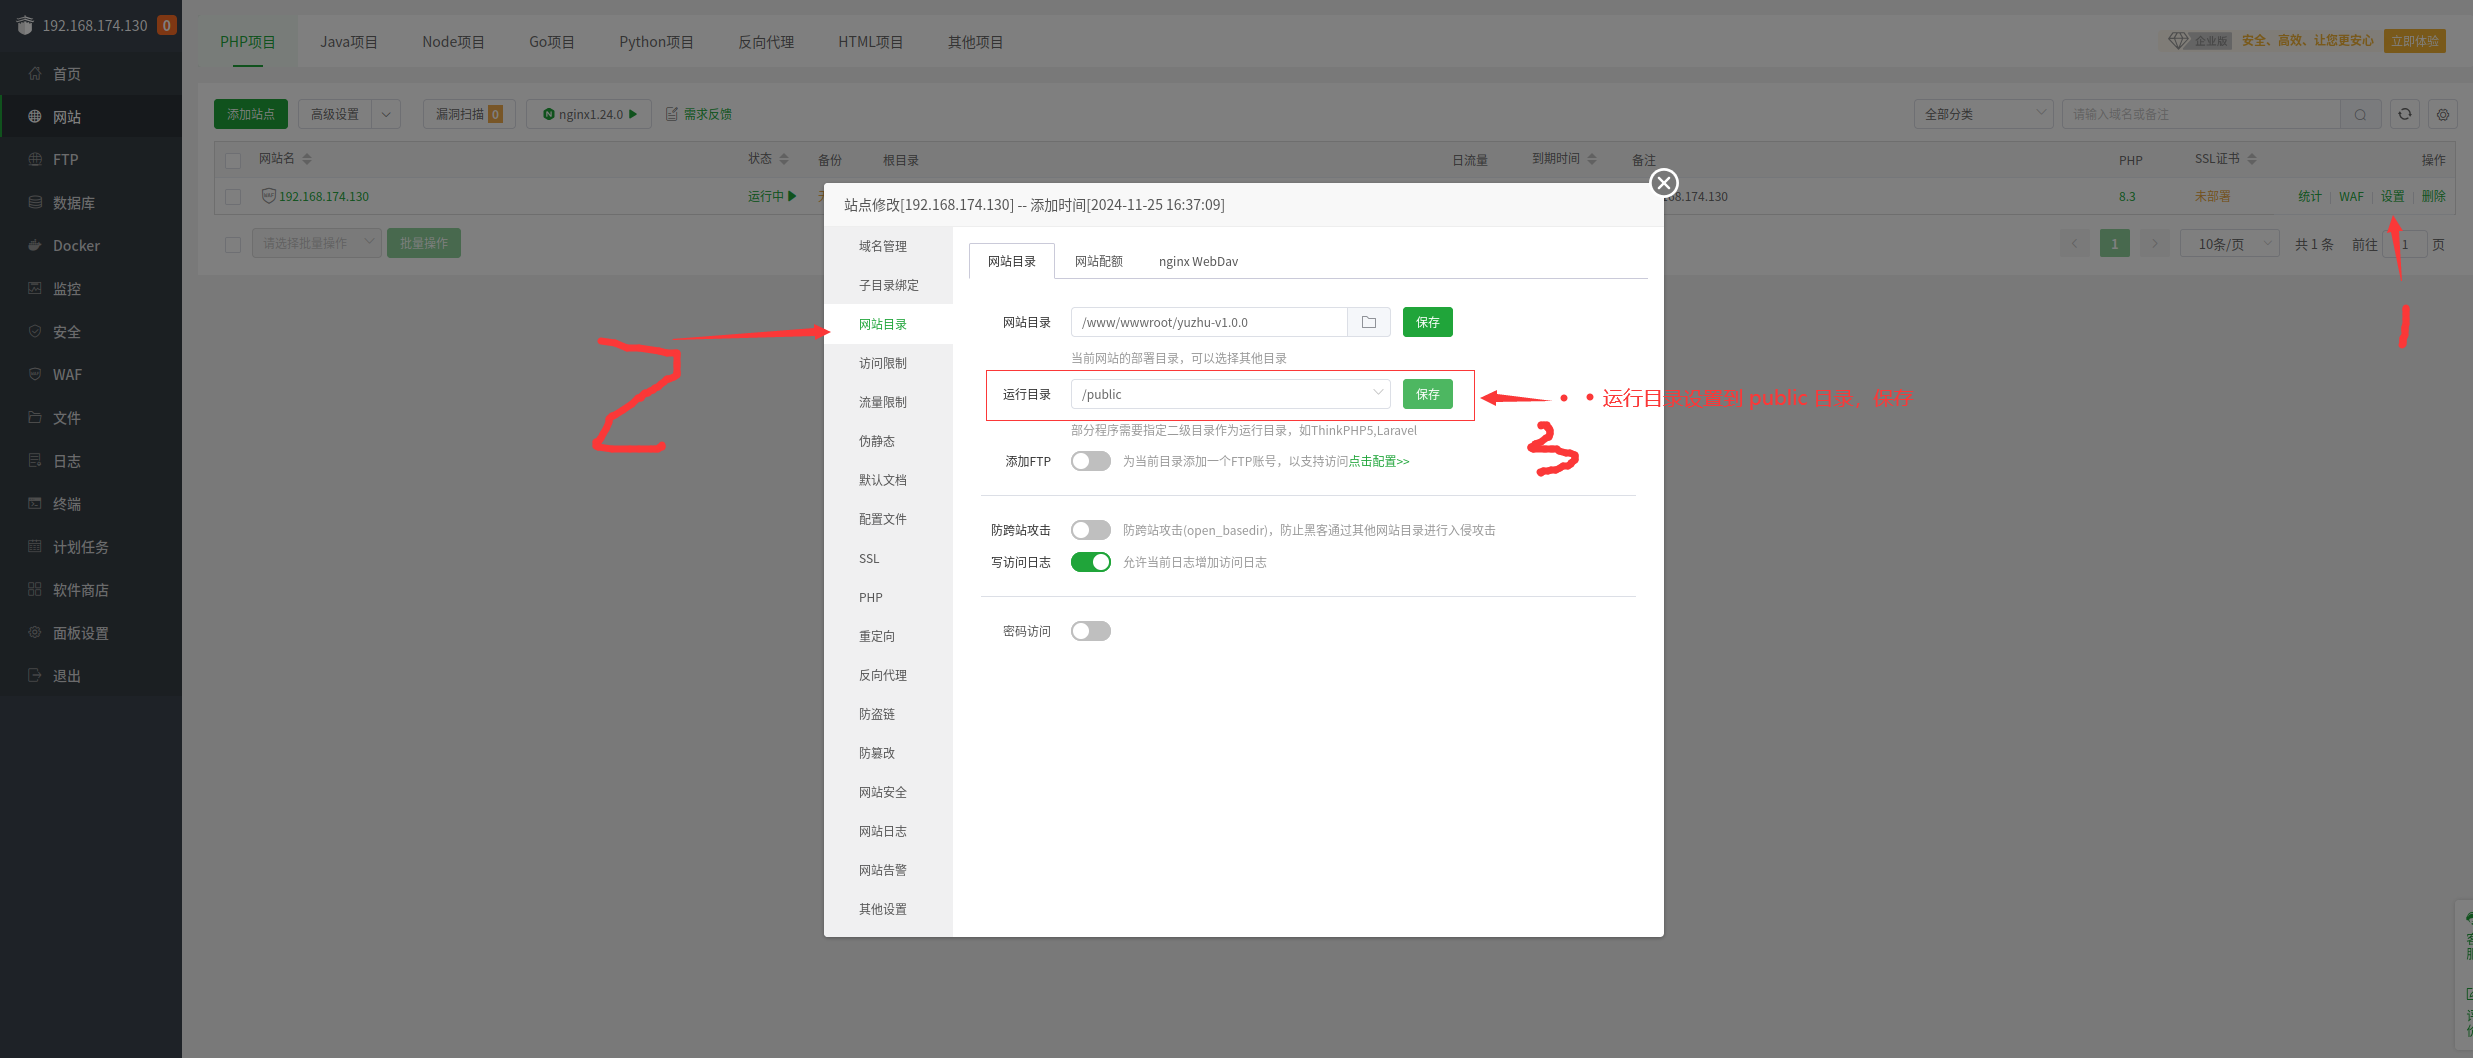
设置运行目录:
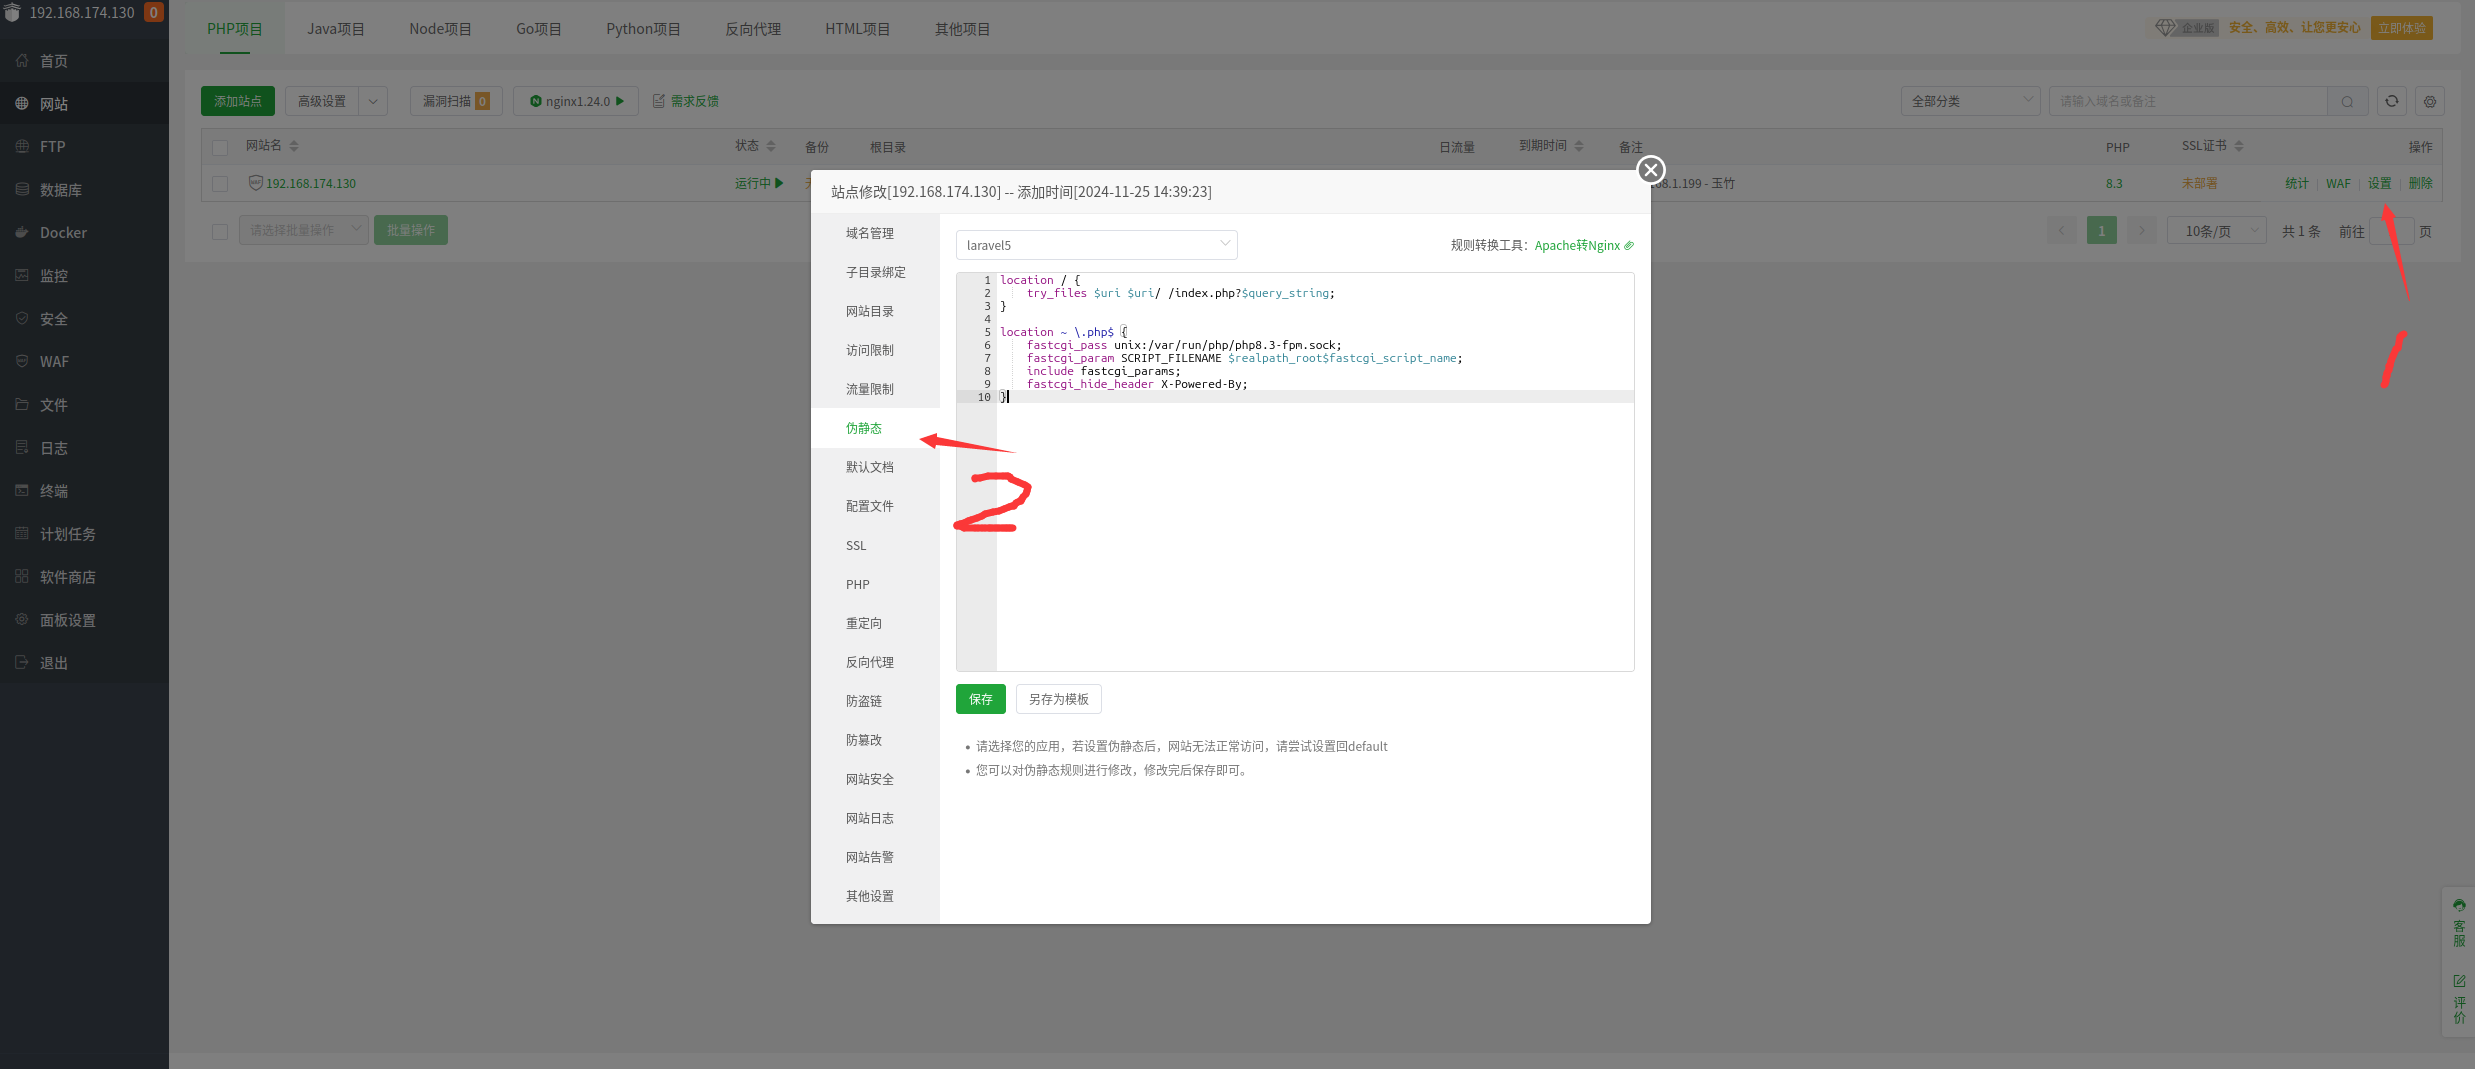
复制粘贴如下内容,注意 php8.3-fpm.sock 这里根据实际的 PHP 版本修改,如果是 8.2 版本,则是 php8.2-fpm.sock, 以此类推。
location / {
try_files $uri $uri/ /index.php?$query_string;
}
location ~ \.php$ {
fastcgi_pass unix:/var/run/php/php8.3-fpm.sock;
fastcgi_param SCRIPT_FILENAME $realpath_root$fastcgi_script_name;
include fastcgi_params;
fastcgi_hide_header X-Powered-By;
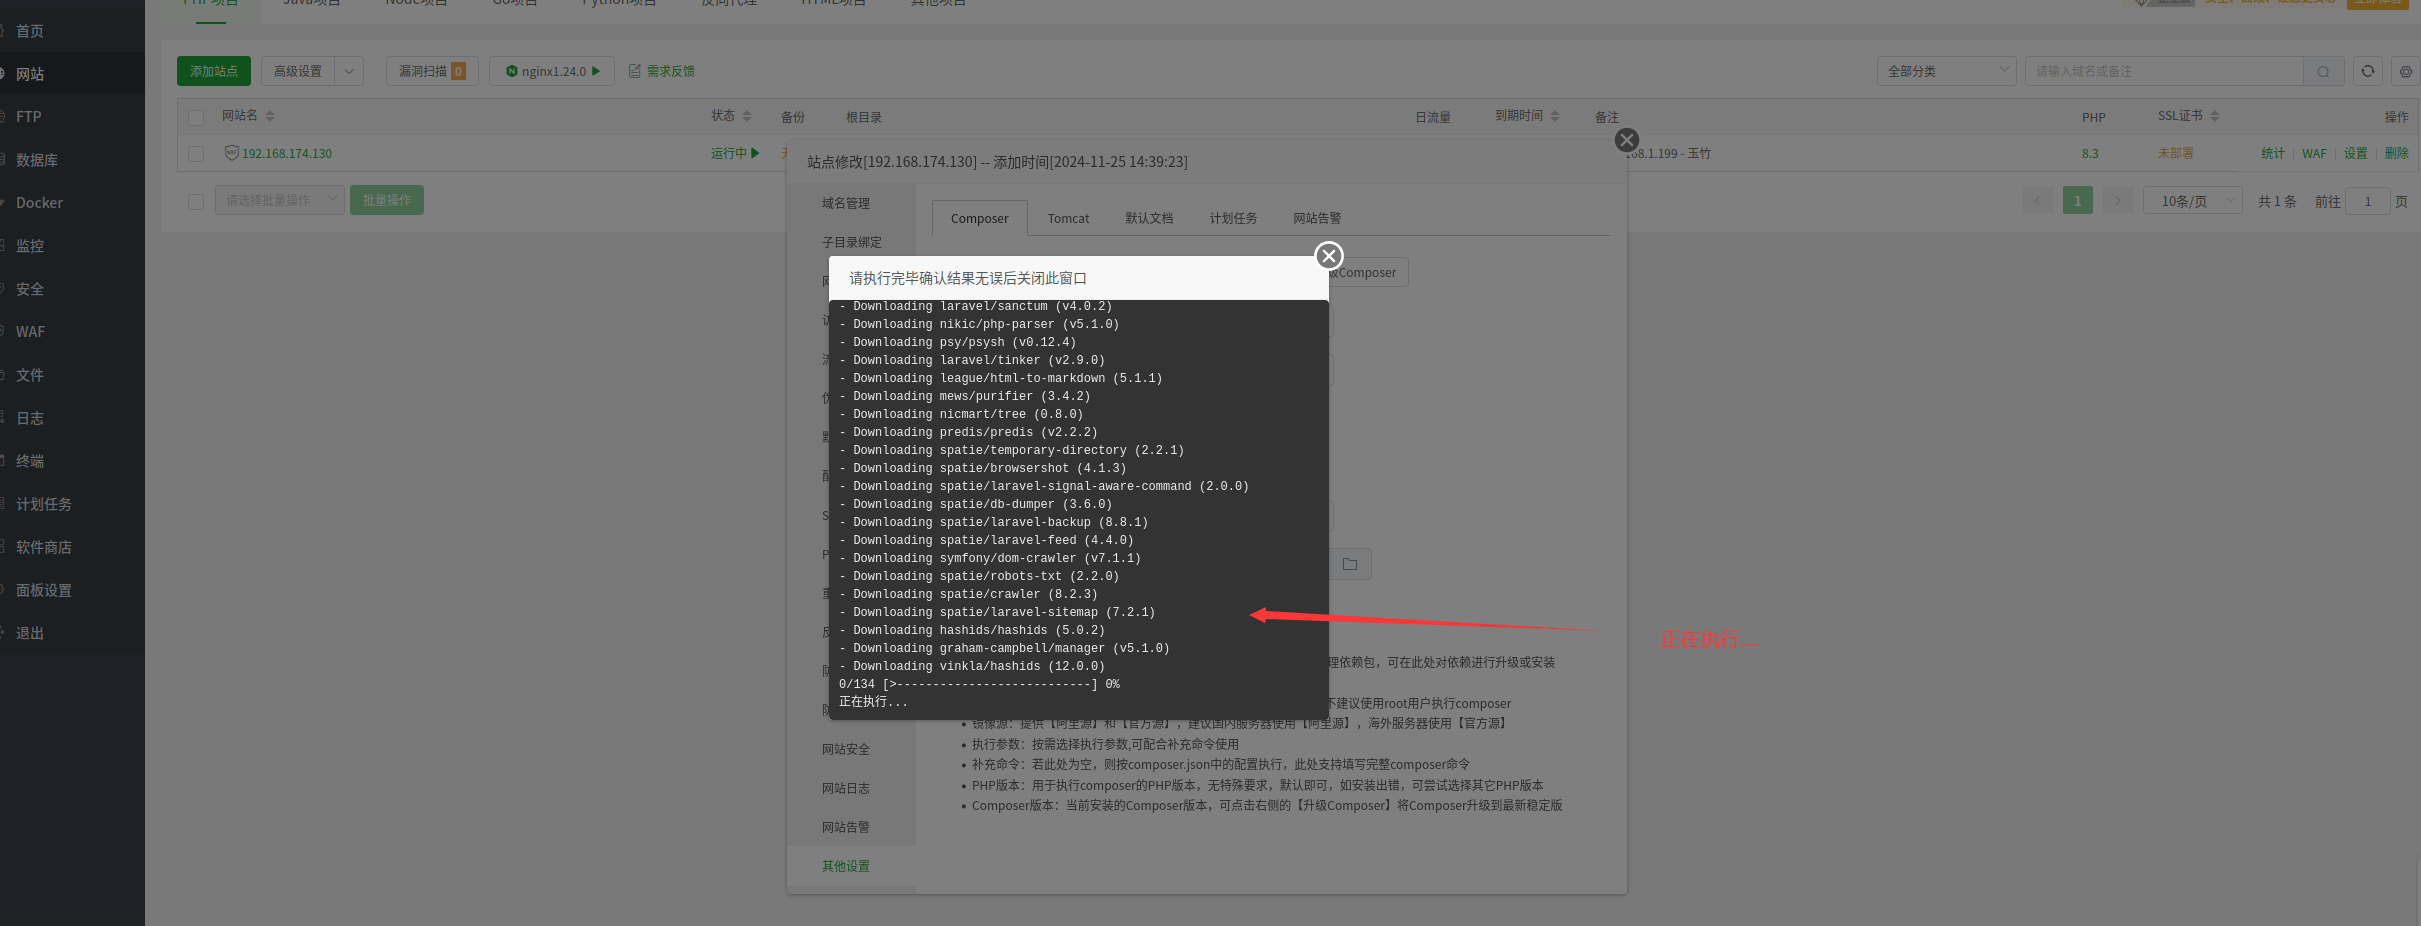
}安装依赖:
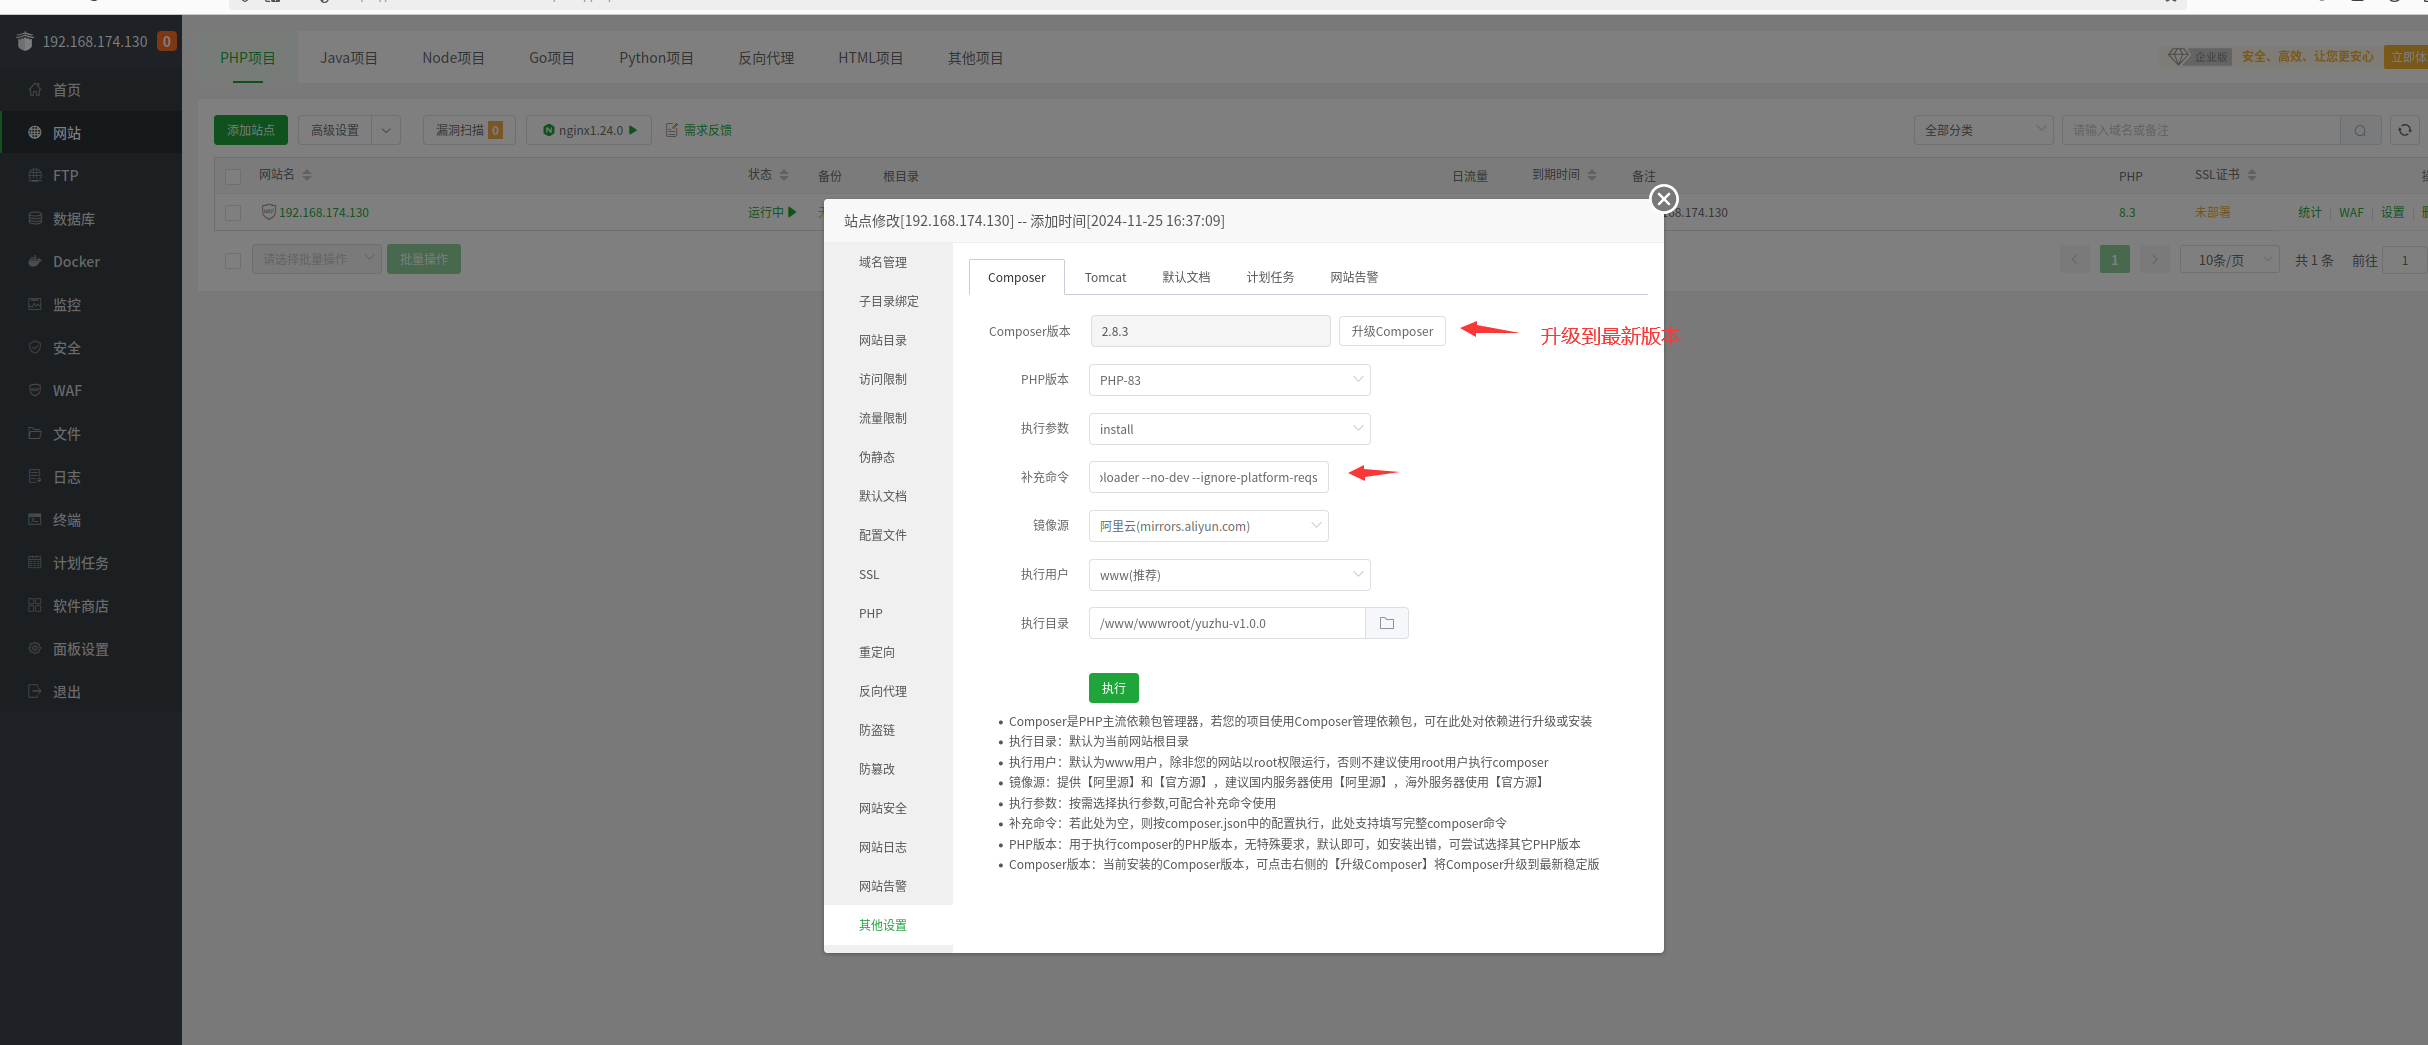
点击【升级Composer】,提示升级成功后,点击左侧的【其他设置】,composer 会应用最新的版本。
复制 --optimize-autoloader --no-dev --ignore-platform-reqs 粘贴到【补充命令】那里。
配置好后点击【执行】。
一点修改:
复制 .env.example 文件,修改名称为 .env,编辑 .env 文件:

修改权限:

需要修改的内容:
APP_NAME=玉竹 #修改为自己的博客名称,若中间有空格、标点符号,请用英文引号("")包裹
APP_ENV=production


APP_URL=http://127.0.0.1 # 修改为自己的域名或公网IP
ASSET_URL=http://127.0.0.1 # 修改为自己的域名或公网IP


MAIL_MAILER=smtp
MAIL_HOST=mailhog
MAIL_PORT=1025
MAIL_USERNAME=null
MAIL_PASSWORD=null
MAIL_ENCRYPTION=null
MAIL_FROM_ADDRESS="hello@example.com"

SESSION_DRIVER=redis

QUEUE_CONNECTION=redis

CACHE_STORE=redis
邮箱配置参考 使用 QQ 邮箱作为邮箱服务。
登入终端,运行命令:
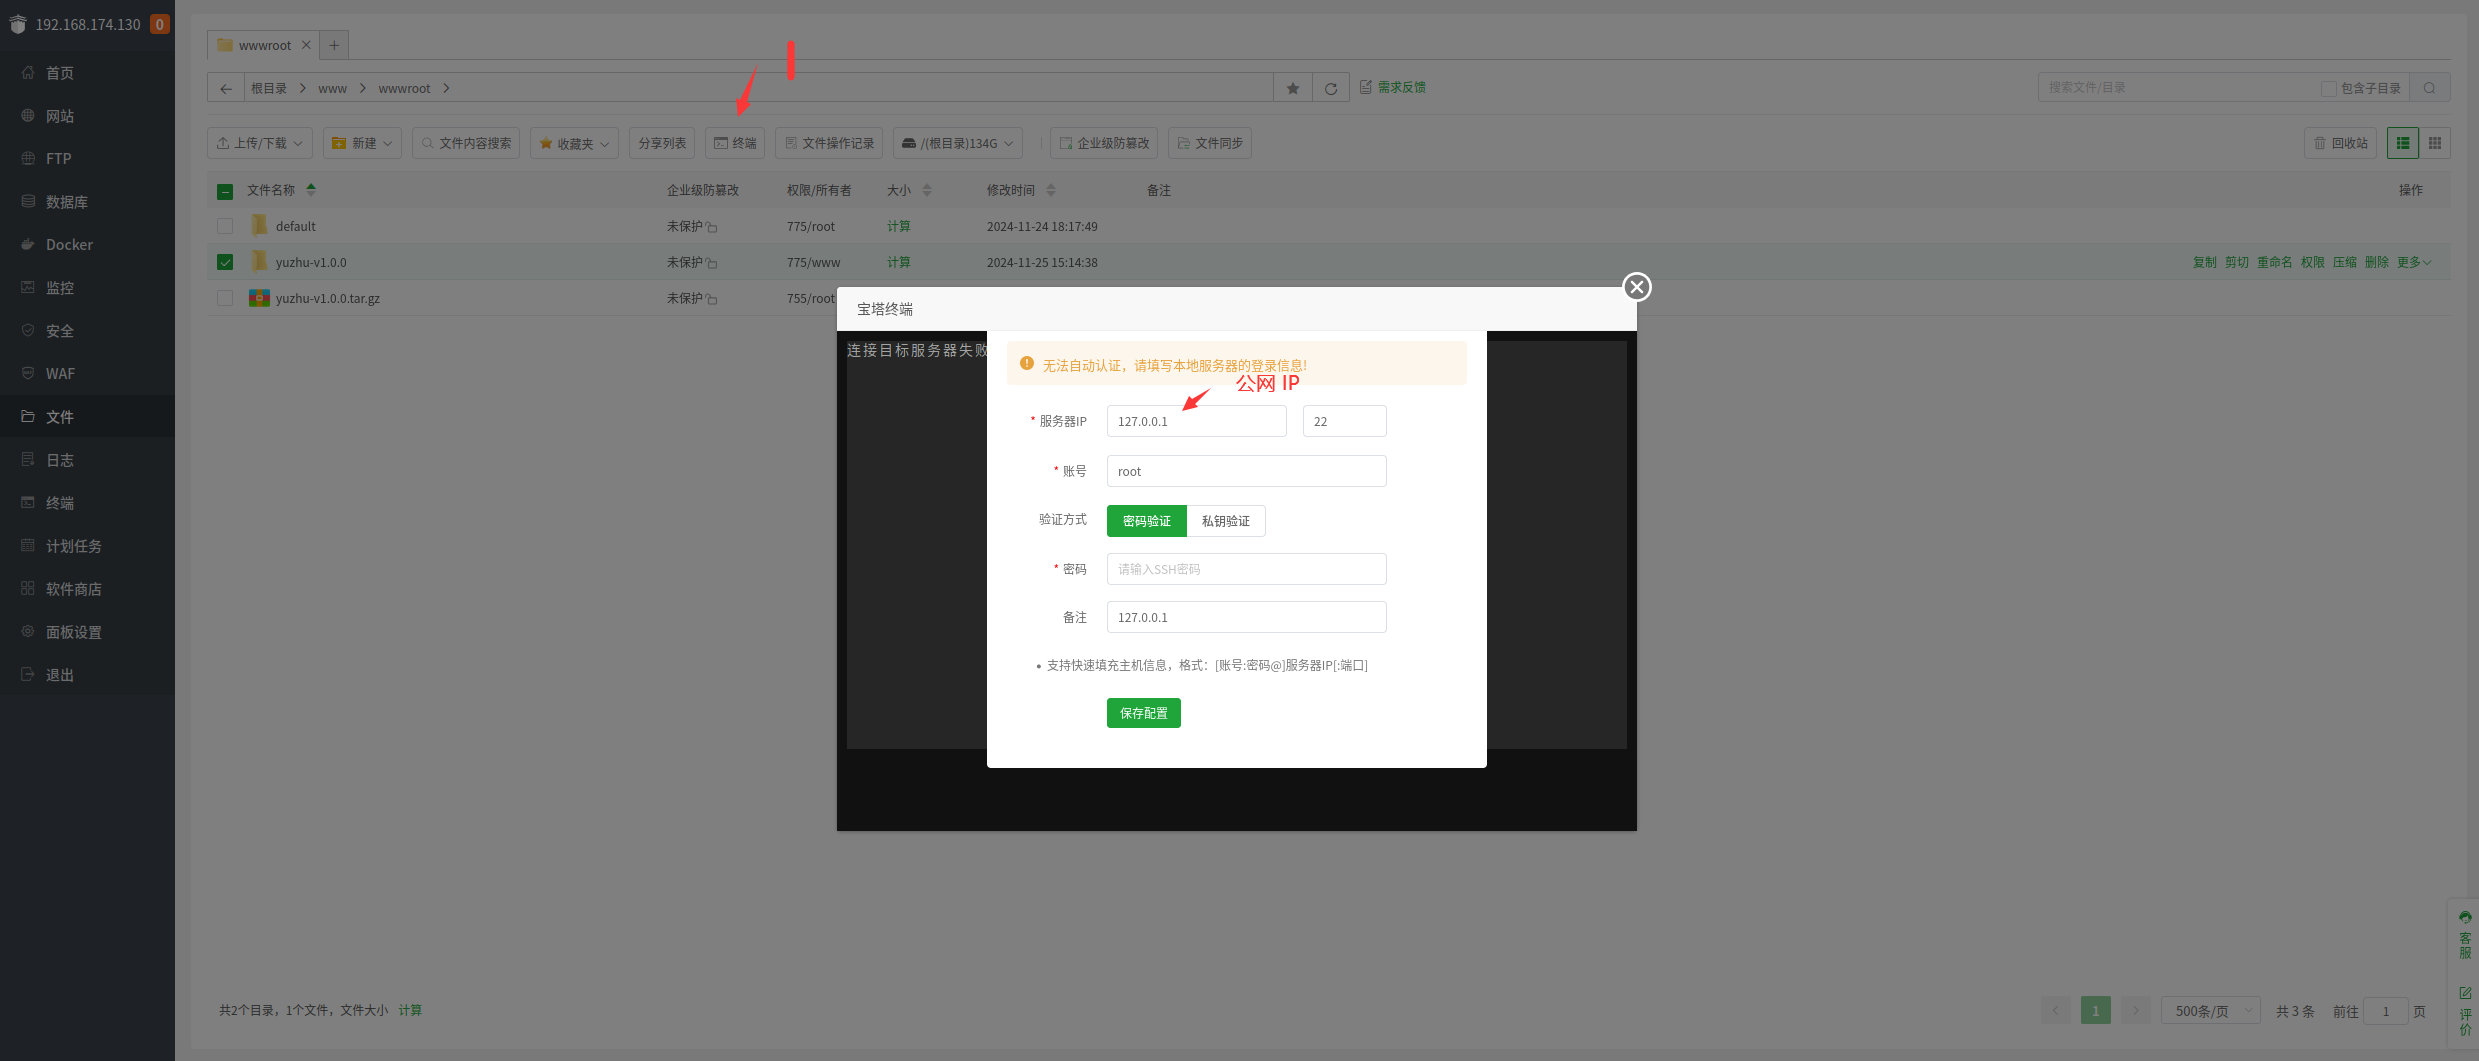
shell
cd /www/wwwroot/yuzhu-v1.0.0 # 修改为实际的目录shell
php artisan key:generate遇到权限问题,可使用 sudo php artisan key:generate 命令。
创建软软连接:
shell
php artisan storage:link初始化数据库:
shell
php artisan migrate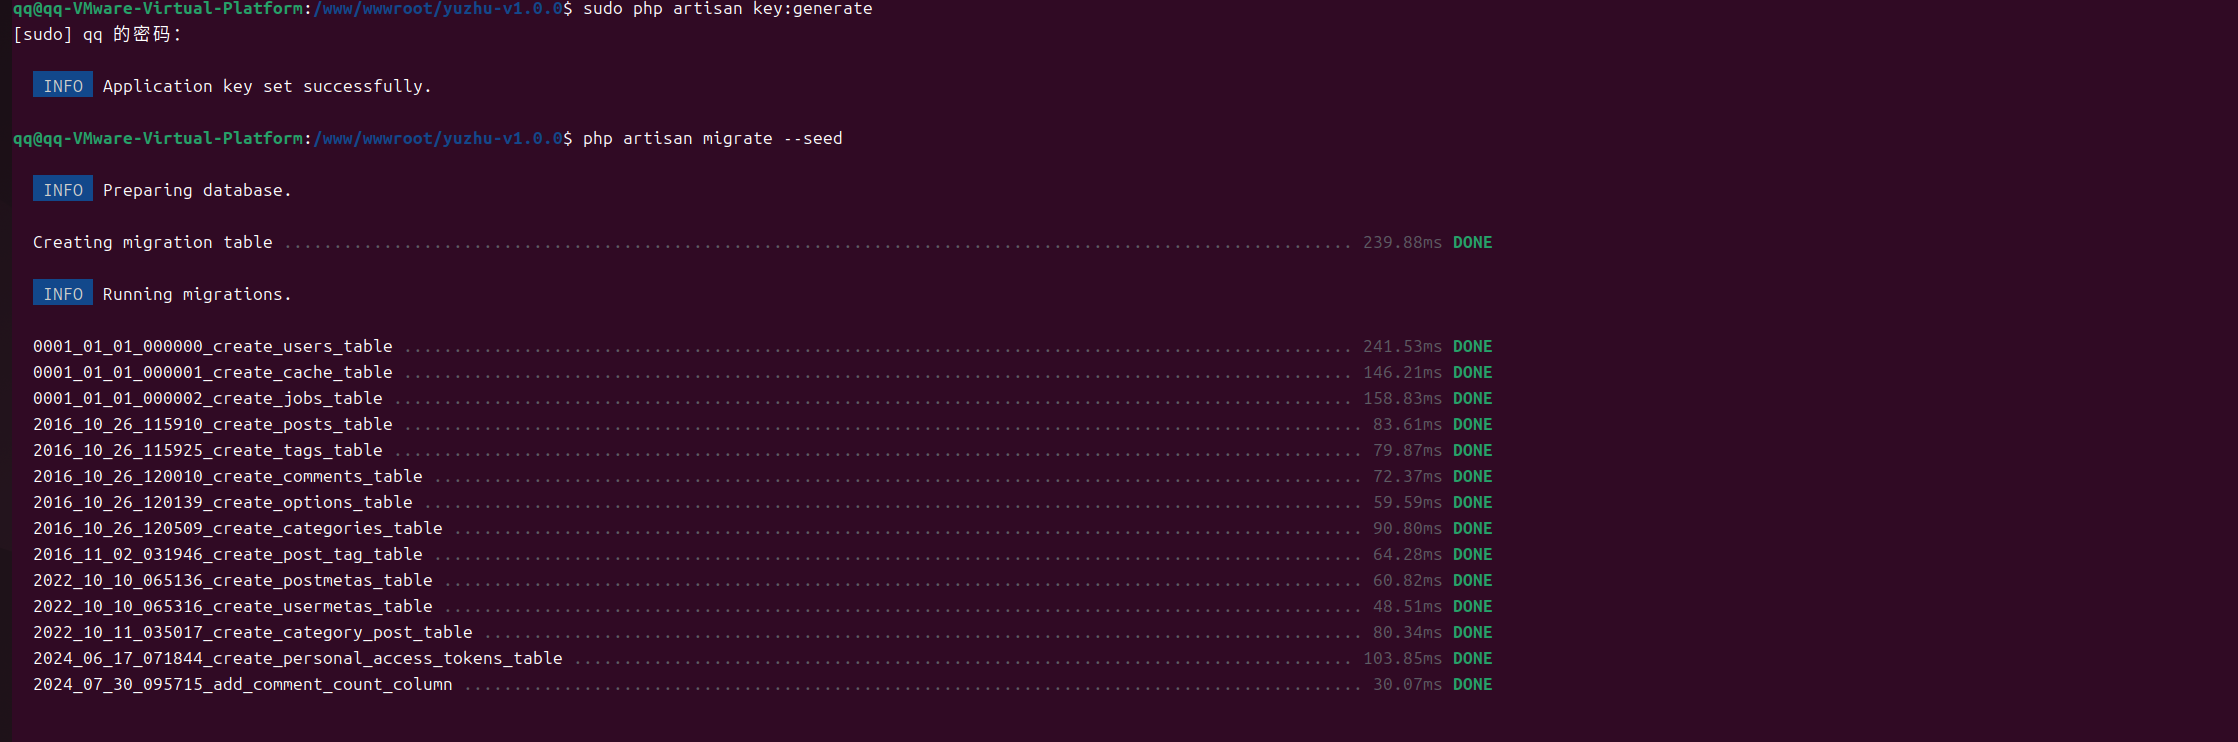
初始化站点:
shell
php artisan yuzhu:init
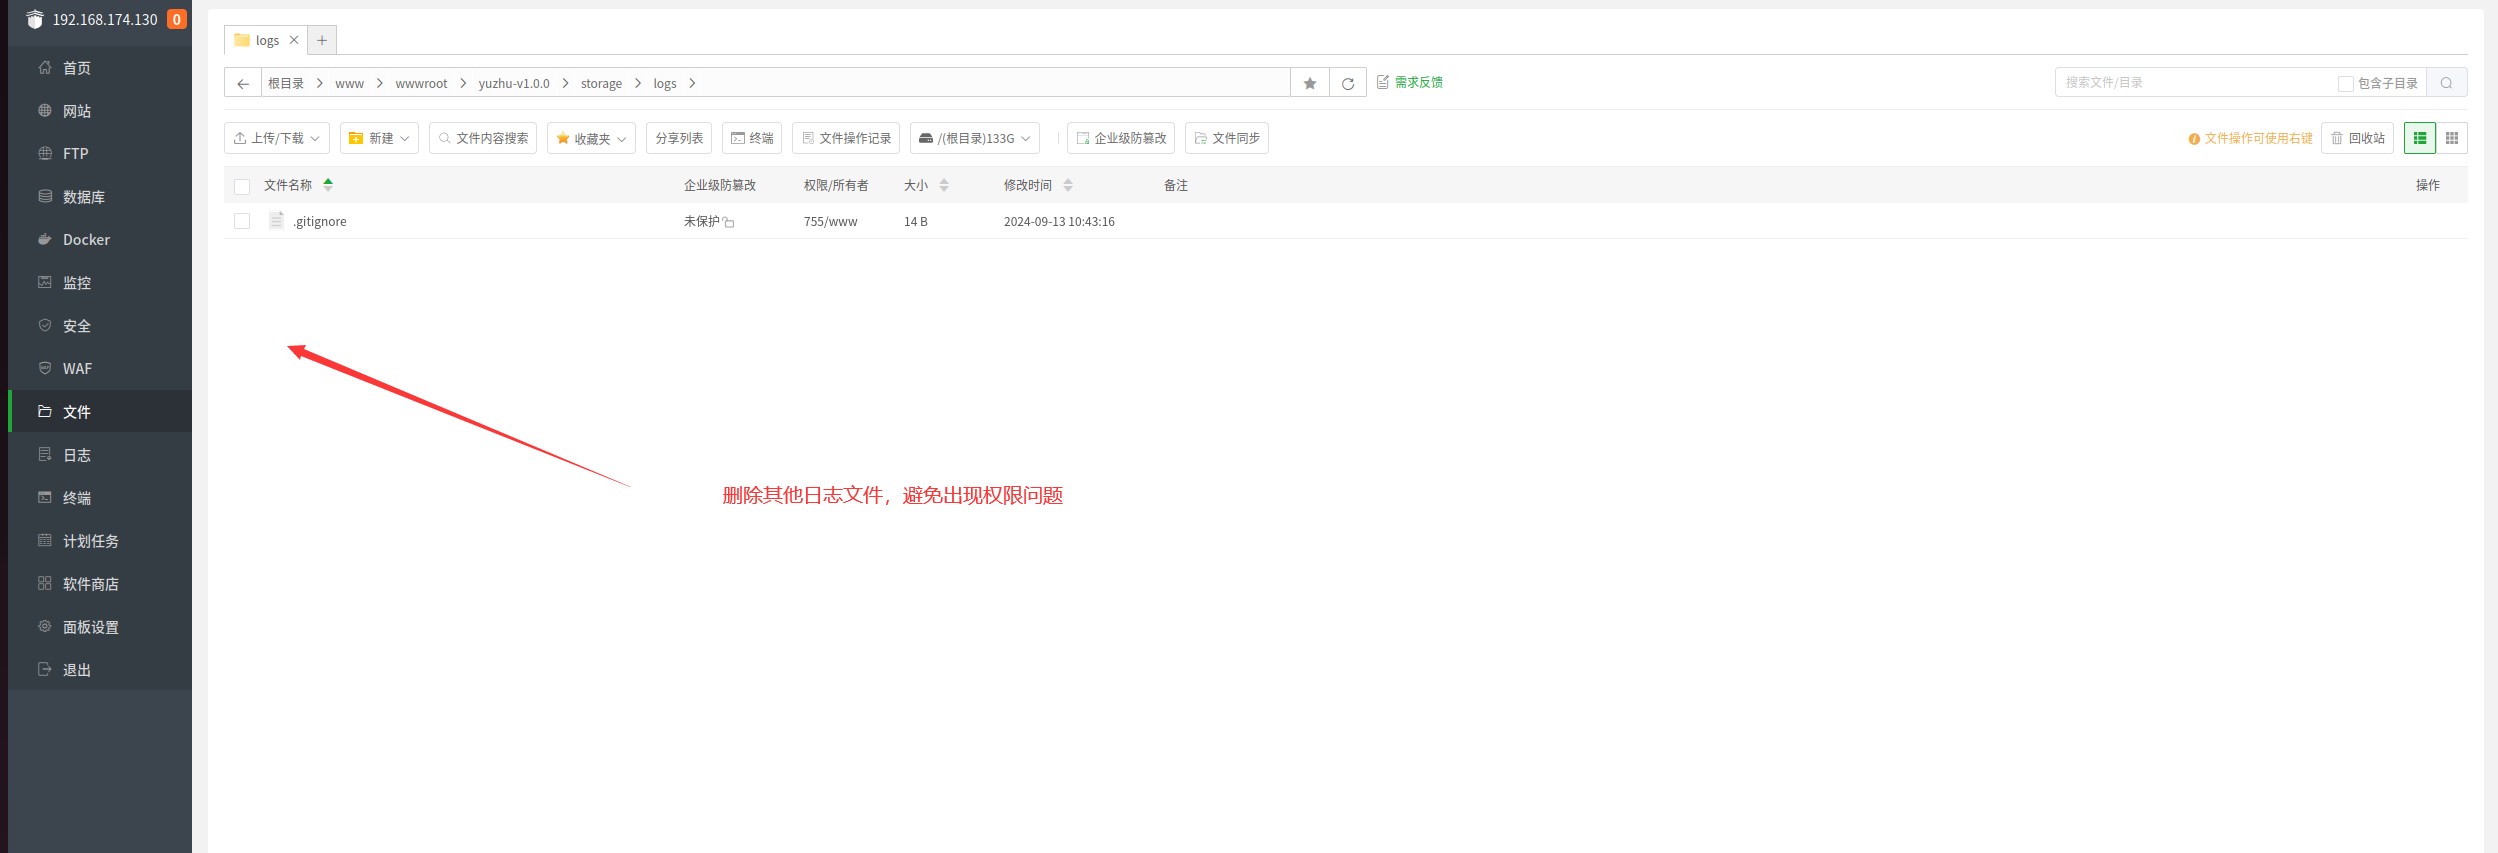
删除安装过程中因报错等生成的 Log 文件,以避免出现权限问题。
访问:
管理后台在域名后添加 /admin 访问即可。
以下操作在终端完成:
安装 supervisor:
shell
sudo apt install supervisorshell
sudo vi /etc/supervisor/conf.d/yuzhu-horizon.conf复制如下内容,注意修改为自己的目录,
[program:yuzhu-horizon]
process_name=%(program_name)s
command=php /www/wwwroot/yuzhu-v1.0.0/artisan horizon
autostart=true
autorestart=true
user=www
redirect_stderr=true
stdout_logfile=/www/wwwroot/yuzhu-v1.0.0/storage/logs/horizon.log
stopwaitsecs=3600
鼠标右键粘贴,然后输入 :wq 保存。
shell
sudo supervisorctl reread

sudo supervisorctl update

sudo supervisorctl start yuzhu-horizon:*
一些优化:
shell
php artisan optimize
php artisan filament:optimize
设置定时任务:

cd /www/wwwroot/yuzhu-v1.0.0 && php artisan schedule:run注意设为自己实际的目录