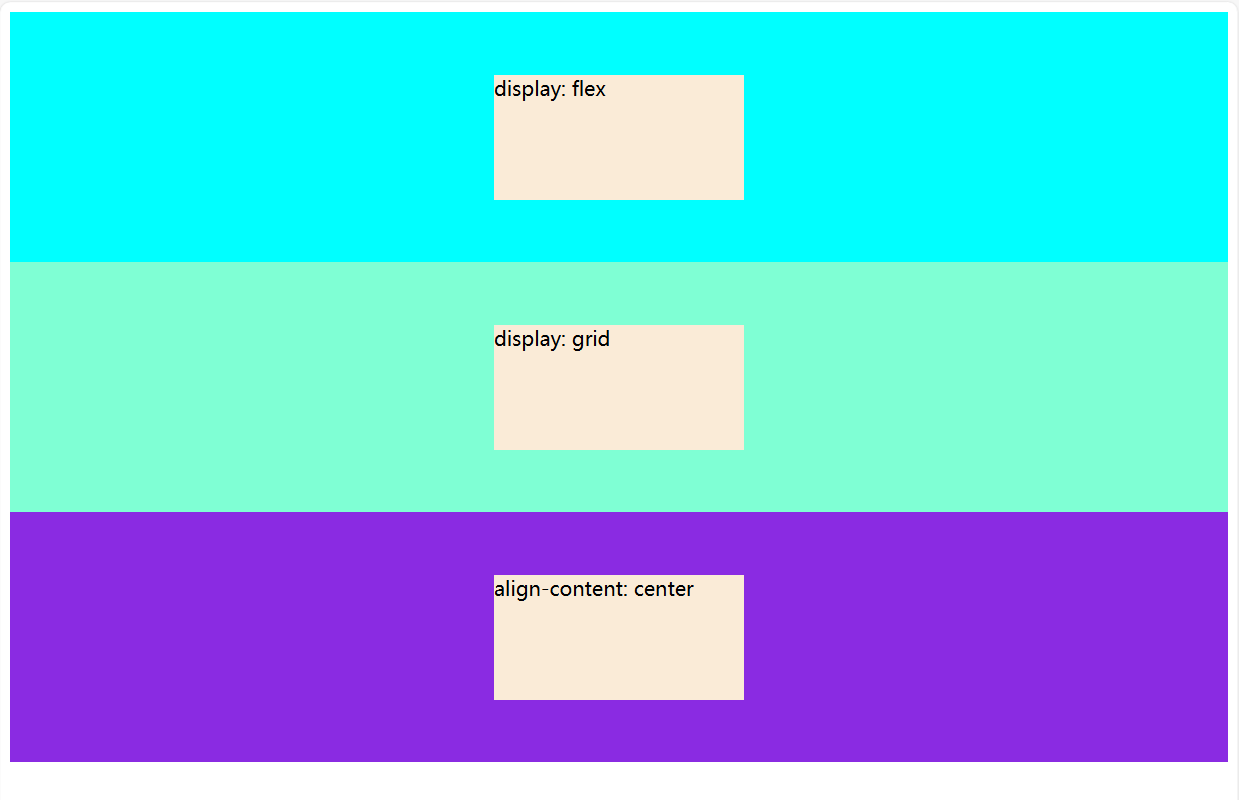
以前实现 div 居中比较方便的方法有:
1 | display: flex; |
1 | display: grid; |
新实现的属性 align-content: center; ,浏览器支持查看🔗
1 | align-content: center; |
示例代码:
1 |
|
示例效果:
参考:
https://build-your-own.org/blog/20240813_css_vertical_center/
以前实现 div 居中比较方便的方法有:
1 | display: flex; |
1 | display: grid; |
新实现的属性 align-content: center; ,浏览器支持查看🔗
1 | align-content: center; |
示例代码:
1 |
|
示例效果:
参考:
https://build-your-own.org/blog/20240813_css_vertical_center/
json_validate() 方法PHP 8.3 提供了 json_validate() 方法, 可以用来验证是否有语法错误:
1 | $fruitsArray = [ |
PHP 8.3 之前的版本,可以使用 symfony/polyfill-php83 包提供的 json_validate() 方法:
1 | composer require symfony/polyfill-php83 |
但是 json_validate() 方法只能验证是否有 JSON 语法错误,要进一步验证 JSON 数据类型等,可以使用 JSON schema:
swaggest/json-schema1 | composer require swaggest/json-schema |
1 | $schemaJson = <<<'JSON' |
1 | require 'vendor/autoload.php'; |
参考:https://dev.to/robertobutti/validating-json-with-json-schema-and-php-2b4i
查询作用域让你以复用的方式为模型查询(Eloquent queries)定义条件约束。通常在模型(Model)中一匿名方法的形式定义、或者定义一个继承自 Illuminate\Database\Eloquent\Scope 接口的类(class)。
查询作用域的分类:
如果使用过 Laravel 的软删除(soft delete)功能,默认会在模型查询中添加全局约束 whereNull('deleted_at') ,还提供了局部作用域 withTrashed 或 onlyTrashed。
假设我们构建一个博客应用,\App\Models\Article 模型中有一个可为 null 的 published_at 字段来存储发布时间,如果 published_at 的时间在当前时间以前,则认为已发布,如果为 null 或者则当前时间之后,则认为未发布。
获取已发布的文章;
1 | use App\Models\Article; |
获取未发布的文章:
1 | use App\Models\Article; |
使用局部作用域来优化上面的逻辑,在 \App\Models\Article 中定义局部作用域:
1 | declare(strict_types=1); |
那么获取已发布文章、未发布文章的逻辑可以改写为:
1 | use App\Models\Article; |
**注意:在 Article 模型中定义的方法名为 scopePublished、scopeNotPublished,然后使用的时候是 published()、>notPublished()。 **
假设我们构建的是一个多租户(multi-tenant)的博客系统,用户只能看到他们所属组的文章,可能的查询:
1 | use App\Models\Article; |
对于这样的系统,需每次添加 where('team_id', Auth::user()->team_id) 约束,简化的方法就是添加全局作用域。有两种方式,一种是通过 php artisan make:scope 命令创建单独的类;二是使用匿名方法;
php artisan make:scope 创建全局作用域1 | php artisan make:scope TeamScope |
将会创建 app/Models/Scopes/TeamScope.php 文件:
1 | declare(strict_types=1); |
注册该全局作用域,有两种方式:
Illuminate\Database\Eloquent\Attributes\ScopedBy 属性:1 | declare(strict_types=1); |
booted 方法中使用 addGlobalScope 方法1 | declare(strict_types=1); |
查询文章的逻辑可以简化为:
1 | use App\Models\Article; |
假设 team_id 为 1 ,那么生成的 sql 如下:
1 | select * from `articles` where `team_id` = 1 |
可以看到,会自动为模型查询添加全局作用域。
直接在模型的 booted 方法中通过匿名方法:
1 | declare(strict_types=1); |
由于全局作用域在模型查询是默认添加的,但是在某些场景下,不需要全局作用域定义的逻辑,可以使用 withoutGlobalScopes 方法忽略全局作用域:
1 | use App\Models\Article; |
默认忽略该模型定义的所有全局作用域, 可以指定忽略特定的作用域:
1 | use App\Models\Article; |
上述代码同时演示了两种方法创建的全局作用域如何指定。
**注意:全局作用域仅在模型查询时添加,如果是用数据库查询,例如 $articles = DB::table('articles')->get(); ,并不会添加全局作用域提供的逻辑。 **
测试用例写法参考原文。
If you want your scheduled task to execute only when some condition is true, use when() to set such conditions inline:
1 | $schedule->command('your:command')->when(function () { |
skip() is the exact opposite of the when() method. If the skip method returns true, the scheduled task will not be executed:
1 | $schedule->command('emails:send')->daily()->skip(function(){ |
You may be running a critical job that should only have one instance running at a time. That’s where withoutOverlapping() ensures that a scheduled task won’t overlap, preventing potential conflicts.
1 | $schedule->command('your:command')->withoutOverlapping(); |
After executing a task, you might want to ping a URL to notify another service or trigger another action. thenPing() lets you do just that seamlessly.
1 | $schedule->command('your:command')->thenPing('http://example.com/webhook'); |
If you want your scheduled task to run in the background without holding up other processes. runInBackground() will help you do this:
1 | $schedule->command('your:command')->runInBackground(); |
You can guess what it does by its name. You can execute scheduled tasks even when your application is in maintenance mode.
1 | $schedule->command('your:command')->evenInMaintenanceMode(); |
创建项目、配置请参考文档。
Laravel 11 默认没有创建 routes/api.php 文件,
1 | php artisan install:api |
创建了 routes/api.php 文件,并在 bootstrap/app.php 文件中自动配置:
1 |
|
进一步配置,在遇到未登录的情况返回错误提示而不是跳转到登录页面:
1 | return Application::configure(basePath: dirname(__DIR__)) |
1 | composer require php-open-source-saver/jwt-auth |
发布配置文件
1 | php artisan vendor:publish --provider="PHPOpenSourceSaver\JWTAuth\Providers\LaravelServiceProvider" |
生成 secret key,保存在 .env 文件中:
1 | php artisan jwt:secret |
在 config/auth.php 文件中修改 auth guard 配置:
1 | 'defaults' => [ |
实现 JWTSubject 接口:
1 |
|
1 | php artisan make:controller AuthController |
完善 app/Http/Controllers/AuthController.php:
1 |
|
在 routes/api.php 文件中添加:
1 |
|
参考:https://www.binaryboxtuts.com/php-tutorials/laravel-11-json-web-tokenjwt-authentication/
例如,你需要创建用户管理的表单,那么应该在 app/Filament/Components 目录下创建 UserForm.php 文件:
1 |
|
1 |
|
通过调用 UserForm::schema(),你可以在项目的任何地方使用该表单。
1 |
|
1 |
|
在Laravel中,你可以配置加载其他环境文件而不是.env文件。此功能有助于测试,您可以在测试中加载 .env.testing 环境文件,而不是默认文件。您通常不需要使用此功能,但通过设置 APP_ENV 环境变量,Laravel可以检测自定义配置。
此功能最直接了当的例子是运行 Artisan 命令或 phpunit 命令时使用不同的环境变量文件。
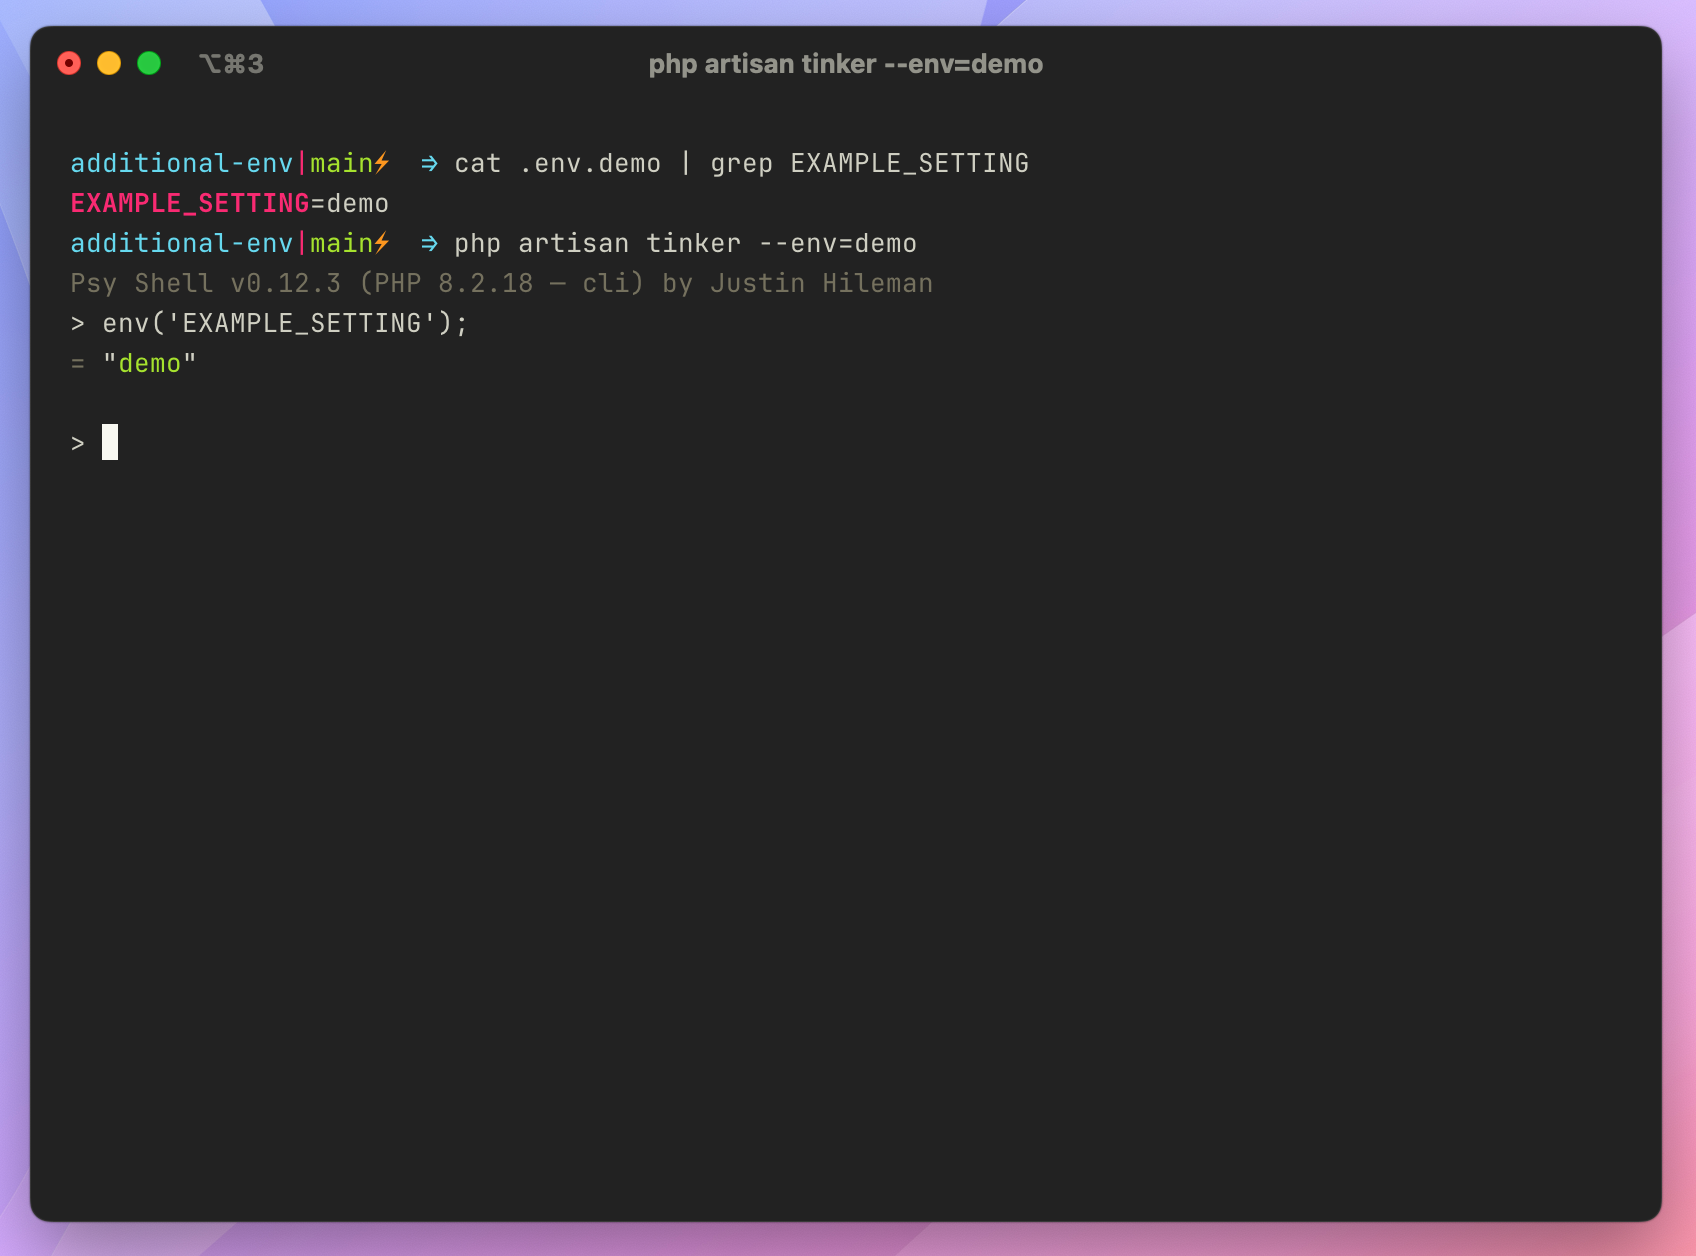
使用 Artisan 命令,你可以使用 --env 参数指定不同的 .env 文件或者定义 APP_ENV。例如,下面的例子使用 .env.demo:
1 | Set up `.env.demo` |
如果查询到, Laravel 会加载 .env.demo 文件而不是 .env 文件。
.env.testingBuilding on what we know about the Laravel framework loading a specific ENV file if it exists, running Laravel feature tests in PHPUnit will use the .env file by default. Using .env for tests and local development could quickly cause issues such as configuring a separate database for testing. You could define database connection details in phpunit.xml, but let’s also look at setting them in .env.testing.
PHPUnit defines an APP_ENV environment variable in phpunit.xml, which means that Laravel looks for a .env.testing file when bootstrapping Feature tests because the phpunit.xml file defines APP_ENV before the Laravel framework gets bootstrapped in Feature tests:
1 | <env name="APP_ENV" value="testing"/> |
That means we can copy the stock .env file to .env.testing and avoid mixing the two files during testing:
1 | cp .env .env.testing |
You can configure environment variables in phpunit.xml. However, I like using the .env.testing file to ensure a clean environment specifically for testing. It’s also up to you whether you version control .env.testing or ignore it in .gitignore.
After copying the .env file, you can verify that .env.testing is loaded by adding the following to a test in your tests/Feature folder. Tests in the tests/Unit folder won’t bootstrap the Laravel framework:
1 | /** |
When I run phpunit, I get the following log confirming that I’m using the .env.testing file:
1 | [2024-05-24 00:22:42] testing.DEBUG: Which environment file is Laravel using? {"file":".env.testing"} |
If you ignore this file in your VCS, you could add an example file .env.testing.example with your team’s conventions or let them decide how to configure tests locally. I recommend setting system-level environment variables in CI to configure things like test databases.
Check out the Laravel Documentation for more details on environment configuration. If you’re curious how this works at the framework level, check out the setEnvironmentFilePath method and checkForSpecificEnvironmentFile in the Laravel framework source code.
假设 json 文件存放在 storage/app/ 目录下:
方法一:
1 | use Illuminate\Support\Facades\File; |
方法二:
1 | use Illuminate\Support\Facades\File; |
方法三:
1 |
|
参考:
https://www.laravelia.com/post/how-to-read-json-file-in-laravel-10
文本点击事件:
1 | ClickableText( |
使用 buildAnnotatedString 实现:
1 | Text(buildAnnotatedString { |
默认情况下,可点击文本以下划线修饰。
可通过 SpanStyle 修改:
1 | Text(buildAnnotatedString { |
参考:
https://joebirch.co/android/migrating-from-the-clickabletext-composable-to-linkannotation/
先决条件:熟悉 Kotlin 的语法。
下载 Android Studio , https://developer.android.google.cn/?hl=zh-cn, 下载完成后,安装基本点击 「Next」即可:

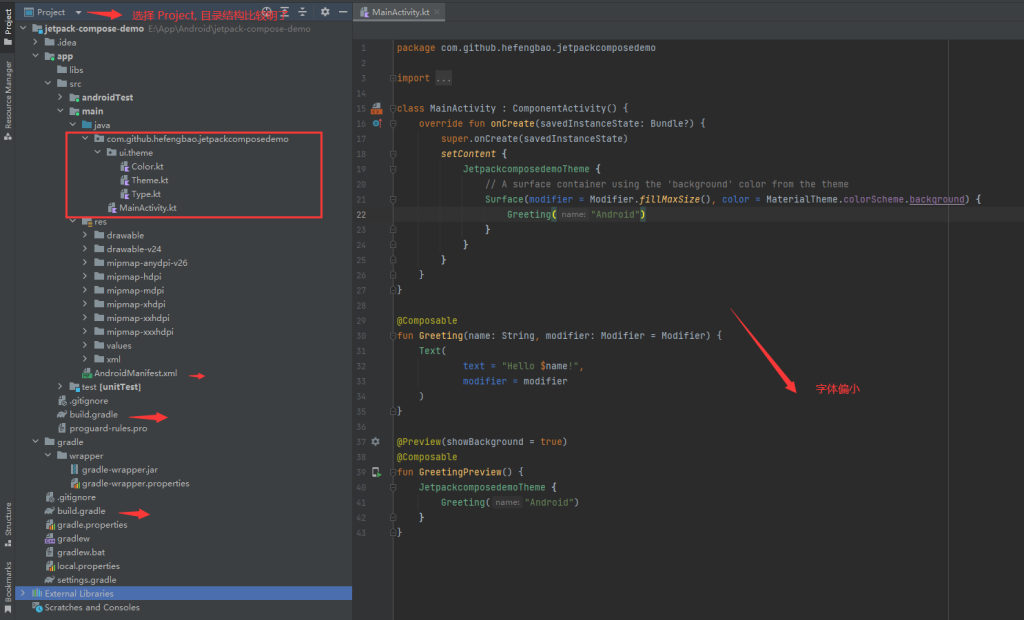
新建项目:


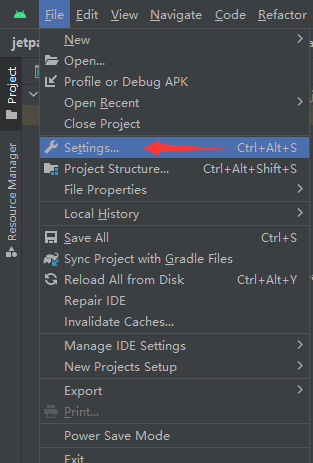
设置:

设置编辑区字体大小:

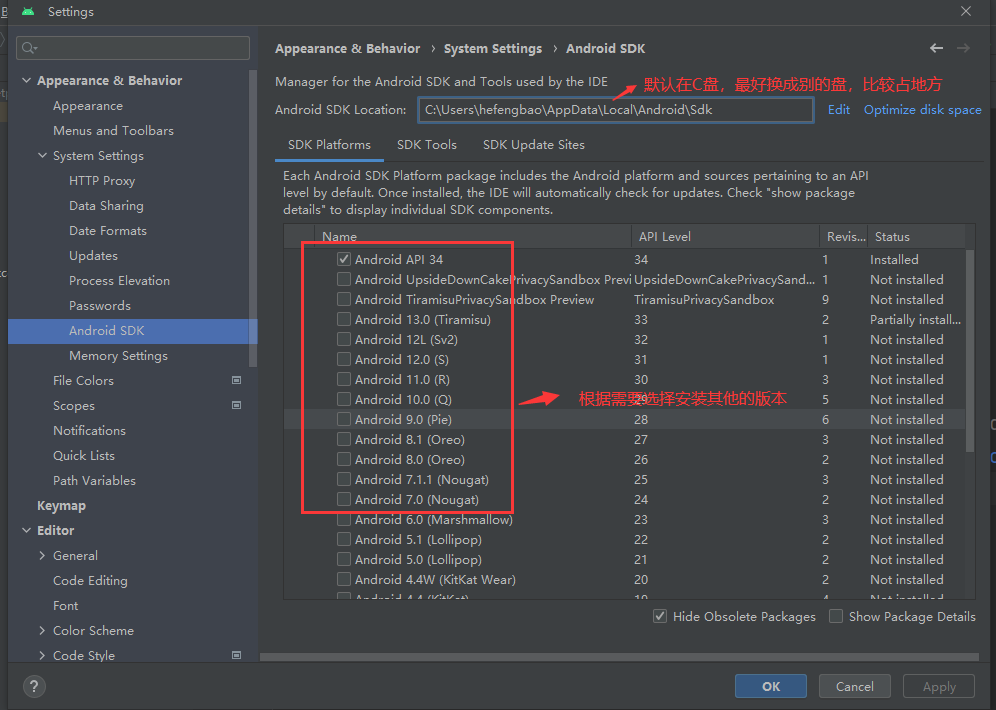
SDK:
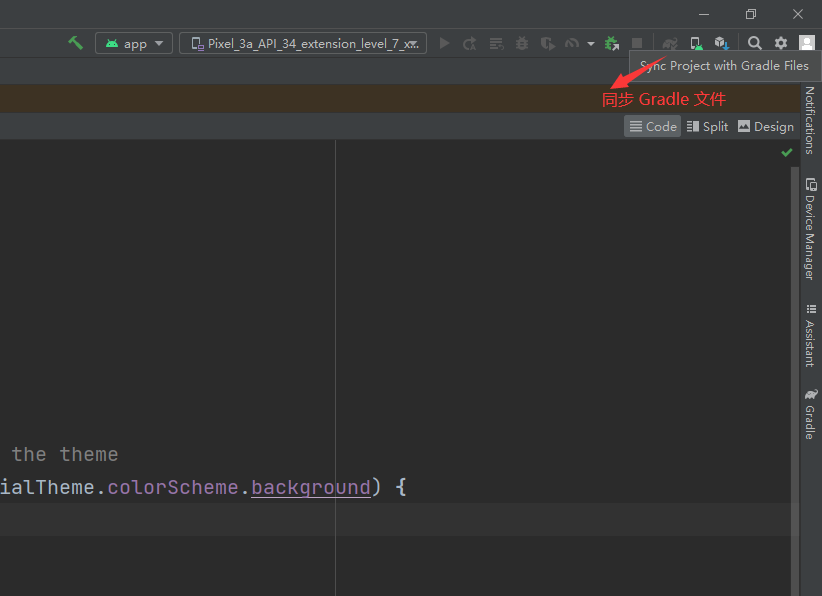
Gradle:

如果重新设置了 gradle 保存目录,则需要在项目中同步 gradle 文件:
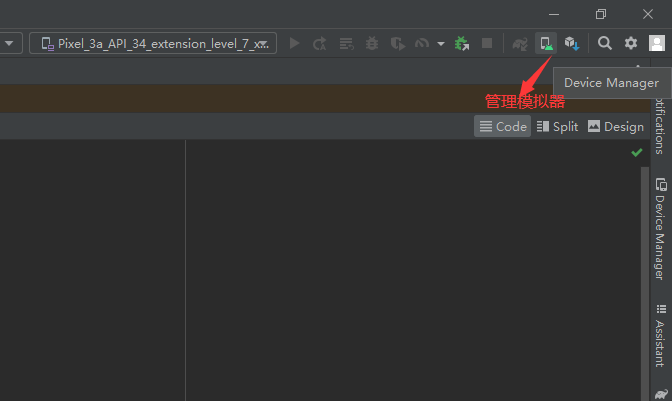
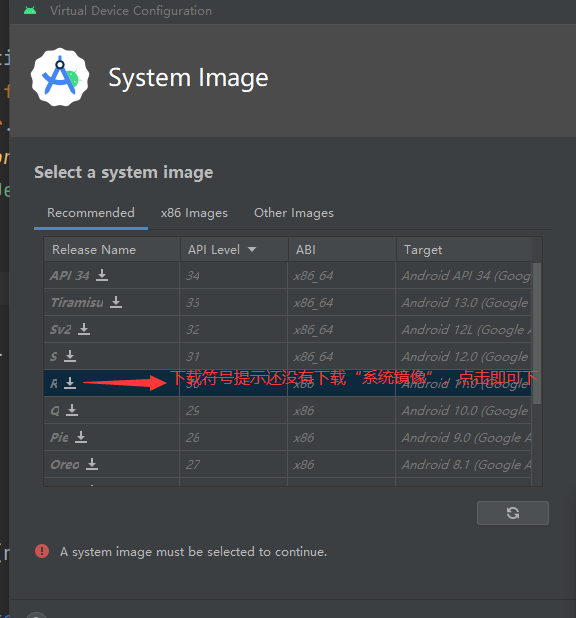
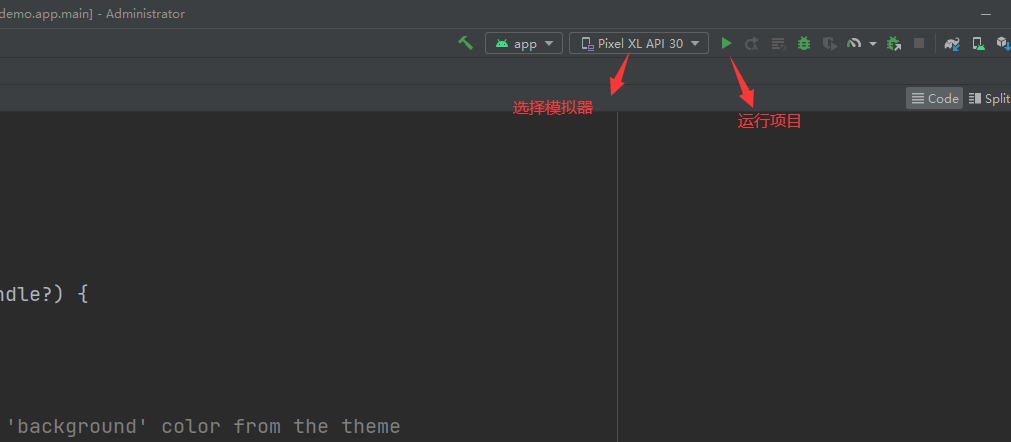
模拟器:

运行项目:
资料: